Power Rack vs Squat Rack vs Stand for Heavy Dumbbell Press Weight
Compare power rack, squat rack, and squat stand setups. Learn installation steps to safely maximize your dumbbell press weight and home gym footprint.

The Core Dilemma: Enclosure vs. Open Space
When building a home gym, the decision between a power rack, a 4-post squat rack, and a minimalist squat stand is usually framed around barbell squats and bench presses. However, if your primary upper-body goal is to safely increase your dumbbell press weight into the 90–120 lb range, your rack choice fundamentally alters your spatial mechanics, safety protocols, and installation requirements. Heavy dumbbell pressing requires massive lateral clearance for the "kickback" phase and a safe drop zone in the event of failure. A poorly planned rack installation can bottleneck your progression or result in catastrophic drywall damage.
In this complete setup and installation walkthrough, we will break down how to measure, anchor, and configure three distinct rack types to optimize your home gym for heavy dumbbell pressing in 2026.
⚠️ The 8-Foot Ceiling Trap
A standard basement ceiling is 96 inches high. A full-height power rack (like the Rogue RM-6 Monster Rack) stands at 90 inches. This leaves only 6 inches of clearance. A standard 100 lb hex dumbbell is roughly 16 inches long. If you attempt to kick back heavy dumbbells inside an enclosed power rack, you will strike the ceiling or the pull-up bar. For heavy dumbbell press weight progressions, open-front racks or shorter stands are often biomechanically superior in standard rooms.
Decision Matrix: Rack Types for Dumbbell Mechanics
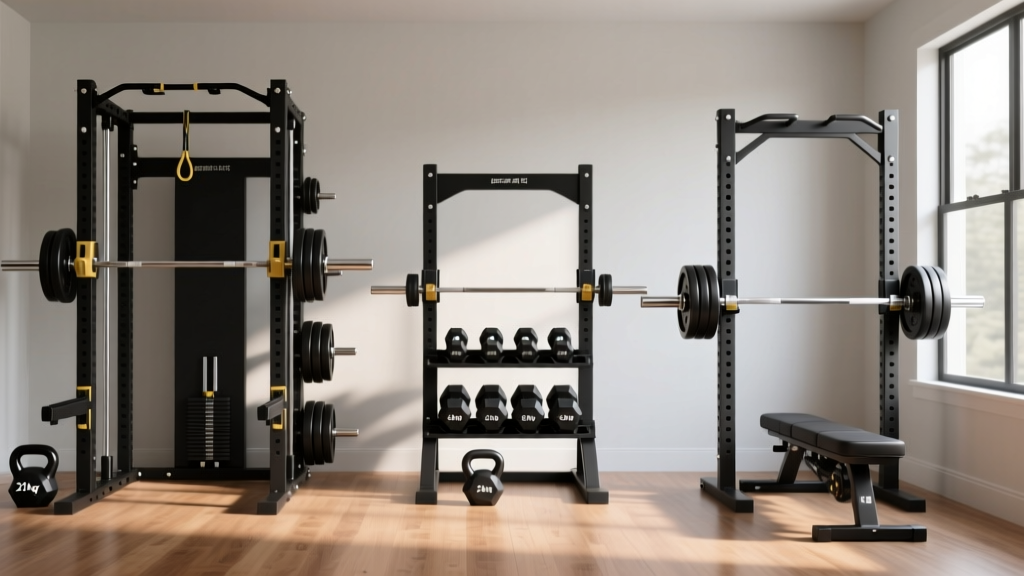
| Equipment Type | Estimated 2026 Cost | Dumbbell Lateral Clearance | Installation Footprint | Ideal For |
|---|---|---|---|---|
| Power Rack (6-Post) | $2,800 - $4,500+ | Restricted (Interior) / Good (Exterior) | 49" x 49" + 24" bench zone | Maximal safety, integrated storage, heavy barbell focus |
| Squat Rack (4-Post Open) | $600 - $900 | Excellent (Open Front) | 48" x 48" + 36" bench zone | Versatile pressing, spotter arm utilization, standard ceilings |
| Squat Stand (2-Post) | $350 - $500 | Unlimited (No Side Uprights) | 48" x 36" (Minimal depth) | Tight spaces, strict dumbbell focus, low ceilings |
Power Rack Installation: The Ultimate Heavy Dumbbell Press Weight Sanctuary
While an enclosed power rack restricts interior dumbbell movement, it remains the gold standard for overall gym safety. To optimize a power rack for heavy dumbbell pressing, you must configure the bench outside the main uprights, utilizing extended spotter arms. Let us walk through the installation of a flat-foot power rack.
Step 1: Floor Preparation and Matting
Before unboxing, lay down 3/4-inch thick vulcanized rubber horse stall mats. Do not install the rack directly on bare concrete if you plan to drop heavy dumbbells nearby. The matting absorbs the kinetic energy of a failed 100 lb dumbbell drop, preventing concrete spalling and protecting the dumbbell's urethane coating.
Step 2: Assembling the Base and Uprights
- Layout the Base: Assemble the 49" x 49" base plate. Use a rubber mallet to seat the uprights into the base sockets.
- Square the Frame: Before tightening any bolts, measure the diagonals from corner to corner. If the measurements are not identical, the rack is out of square. Adjust until perfectly square, then torque the base hardware to 80 ft-lbs using a calibrated torque wrench.
- Attach Crossmembers: Install the front and rear stabilizers. For heavy dumbbell pressing outside the rack, ensure the front crossmember is a flat-foot design so it does not create a tripping hazard when you walk the dumbbells backward to the bench.
Step 3: Configuring Extended Spotter Arms
To safely spot a maximal dumbbell press weight outside the rack, standard 12-inch safety straps are insufficient. You must install 24-inch or 30-inch pin-pipe safeties or safety straps on the front uprights. Set the height exactly 2 inches below your chest level at the bottom of the pressing range of motion. This allows you to dump the dumbbells laterally onto the safeties if your stabilizers fail, rather than dropping them onto your face or floor.
Squat Rack (4-Post) Setup: Balancing Stability and Accessibility
The 4-post open-front squat rack (such as the Titan T-3 Series) is widely considered the sweet spot for home gym owners who prioritize dumbbell pressing. The open front allows you to slide an adjustable bench directly into the rack for barbell work, or pull it out for unrestricted dumbbell kickbacks, all while maintaining a robust footprint that resists tipping.
"When pushing past 80 lb dumbbells, the clean-to-chest phase requires aggressive leg drive and backward momentum. An open-front squat rack allows you to walk backward from your dumbbell storage tree without navigating around a front crossmember, significantly reducing the risk of a trip-and-fall with live weight."
— Home Gym Engineering Best Practices, BarBend Equipment Analysis
Anchoring a 4-Post Rack
While 4-post racks are inherently stable, the lateral forces generated by dropping heavy dumbbells onto adjacent spotter arms can cause "walking" over time. If your rack features front stabilizer feet with pre-drilled holes, anchor them using 1/2-inch wedge anchors.
- Drilling: Use a hammer drill with a 1/2-inch carbide-tipped masonry bit. Drill to a depth of 3.5 inches.
- Cleaning: Use a shop-vac to remove all concrete dust from the hole. Failure to clean the hole reduces anchor pull-out strength by up to 40%.
- Setting the Anchor: Insert the wedge anchor through the rack foot, thread the nut, and tighten with a wrench until the threads are fully engaged and the rack is immovable. For a comprehensive guide on concrete fasteners, refer to the Home Depot Concrete Anchor Installation Guide.
Squat Stand Configuration: Minimalist Footprint, Maximum Clearance
For garages with low ceiling clearance or athletes who exclusively focus on dumbbell pressing and Olympic lifting, a heavy-duty squat stand (like the Rep Fitness SR-4000 with 3x3 uprights) offers unlimited lateral space. There are no side uprights to scrape your knuckles against when pressing 120s, and no overhead obstructions for the kickback.
The Bolt-Down Imperative
Unlike a 6-post power rack, a 2-post squat stand must be bolted to the floor or heavily counterweighted. The moment arm created by a user racking a heavy barbell, or the vibration from dropping 100 lb dumbbells on the floor nearby, can easily tip an unanchored stand.
💡 Pro-Tip: Weight Storage as a Counter-Balance
If you cannot drill into your concrete floor (e.g., rented garage space), you must configure your squat stand with rear weight storage pegs. Loading 400+ lbs of bumper plates onto the rear storage horns lowers the center of gravity and acts as a cantilever counter-balance, effectively neutralizing the tipping risk during heavy lifts.
Optimizing Your Layout for Dumbbell Press Weight Progression
Installing the rack is only half the battle. To systematically increase your dumbbell press weight, your surrounding environment must support the mechanics of the lift. Implement the following spatial rules:
- The 48-Inch Drop Zone: Measure 48 inches laterally from the edge of your bench on both sides. This is your "failure drop zone." Ensure no rack uprights, plate trees, or walls encroach on this space. When failing a heavy dumbbell press, you must be able to drop the weights straight down to the floor without twisting your rotator cuffs.
- Dumbbell Storage Proximity: Position a 3-tier dumbbell rack exactly 24 inches behind the head of your bench. This allows you to sit, grab the heavy dumbbells, and perform the knee-kickback in one fluid motion without carrying 240 lbs of combined weight across the room.
- Lighting and Mirrors: Install overhead LED lighting directly in front of the bench, not directly above it. Directly overhead lights will blind you at the lockout portion of the dumbbell press, causing premature fatigue and missed reps.
Expert Troubleshooting & Safety Checks
After completing your installation, run through this pre-flight checklist before attempting a new 1-rep max on your dumbbell press:
- Hardware Settling: After 30 days of use, the vibration from dropped weights will cause factory hardware to settle. Re-torque all structural bolts to manufacturer specifications.
- Spotter Arm Slippage: If using UHMW plastic-lined spotter arms, check for deep gouges. Heavy hex dumbbells dropped from the lockout position can crack plastic liners over time, exposing the steel underneath and potentially damaging your dumbbell handles.
- Concrete Spalling: Inspect the concrete around your wedge anchors. If you see hairline cracks radiating from the bolt, the concrete is failing under dynamic load. You will need to inject a two-part epoxy anchoring adhesive to stabilize the mount.
Frequently Asked Questions
Can I use a power rack for heavy dumbbell presses if I have a 10-foot ceiling?
Yes. If you have 120 inches of ceiling clearance, a 90-inch power rack provides 30 inches of overhead space. This is more than enough to perform aggressive dumbbell kickbacks and lockouts inside the enclosure, allowing you to utilize the rack's interior safety straps for ultimate protection.
Do I need a specialized bench for heavy dumbbell pressing inside a squat stand?
You need a bench with a wide, tripod-style rear base. Standard narrow-base benches can tip laterally if you unevenly drop a heavy dumbbell or shift your weight aggressively during the clean-to-chest phase. Look for benches with a minimum 36-inch rear footpad width.
More gear to consider
All reviews
Troubleshooting Alt Dumbbell Curls and Barbell Collar Clamp Failures

Rubber Hex vs Urethane vs PowerBlock Dumbbell: Budget Breakdown

2026 Market Trends: Dumbbell Racks for Abs Training With Dumbbells
Barbell Setup & Knurling: Beyond Chest and Back Dumbbell Exercises

Best Dumbbell Racks to Optimize Thigh Workouts with Dumbbells (2026)