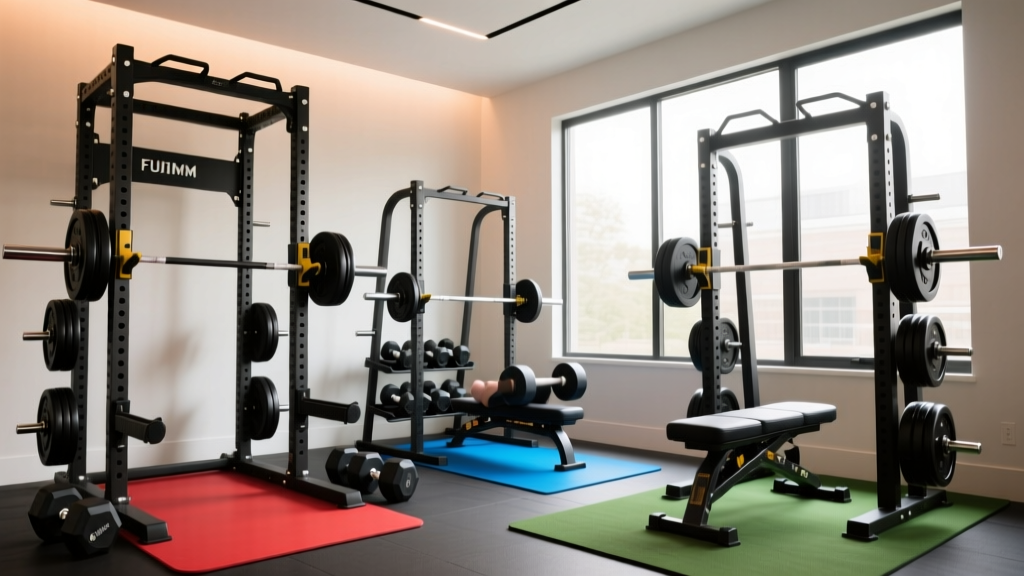
Power Rack vs Squat Rack vs Stand: Dumbbell Exercises for Breast Lift
Master your home gym upgrade! We compare power rack vs squat rack vs squat stand to safely progress your dumbbell exercises for breast lift routines.

The Dumbbell Ceiling: Why You Need to Upgrade Your Home Gym
When most beginners start their fitness journey, they rely heavily on adjustable dumbbells. It is incredibly common to search for dumbbell exercises for breast lift—routines focusing on the pectoralis major to build a natural, lifted chest shelf. Movements like the dumbbell incline press, chest fly, and pullover are fantastic starting points. However, as your neuromuscular efficiency improves and your connective tissues adapt, you will inevitably hit the "dumbbell ceiling."
The dumbbell ceiling occurs when your stabilizing muscles (like the rotator cuff) fatigue before your primary movers (the pecs) reach true mechanical failure. Furthermore, maneuvering heavy dumbbells (typically above 50 lbs per hand) into an incline pressing position places immense, unnecessary shear force on the anterior shoulder capsule. To continue progressing safely and effectively, you must transition to barbell movements or heavily supported machine-based equivalents. This requires a proper racking system.
Biomechanics Note: The "Lift" Effect
The aesthetic "lift" associated with chest training is primarily driven by hypertrophy of the clavicular head (upper chest) of the pectoralis major. According to ExRx Kinesiology, targeting this specific muscle belly requires an upward and inward line of pull, best achieved through incline pressing and high-to-low cable crossovers. A proper rack system allows you to load these movement patterns heavily and safely.
Step 1: Evaluating the Squat Stand (The Minimalist Approach)
A squat stand consists of two independent vertical uprights, usually featuring adjustable J-cups to catch the barbell. They are the most space-efficient option on the market, making them ideal for apartment dwellers or small garages.
Specifications & Real-World Data
- Footprint: Typically 48" x 48" (16 square feet).
- Steel Gauge: Look for 11-gauge or 3x3" steel. Avoid 14-gauge stands, which can sway during heavy re-racking.
- Pricing (2026 Market): $350 - $500 (e.g., Rogue SML-1 or REP Fitness A-Frame).
- Weight Capacity: 800 - 1,000 lbs.
The Failure Mode: Squat stands have a high center of gravity and a narrow base. If you attempt to bench press heavily on a squat stand without bolting it to a platform, the forward momentum of racking the bar can tip the entire unit onto your chest. For solo lifters focusing on heavy chest isolation, a basic squat stand is not recommended unless you purchase heavy-duty spotter arms and bolt the base to the floor.
Step 2: The Squat Rack (The Open-Concept Workhorse)
Often confused with a power rack, a true squat rack (or half-rack) features four uprights but remains open in the front or sides. The two front posts hold the J-cups, while the two rear posts provide a base for pull-up bars and weight storage.
Why It Works for Chest Progressions
The open design of a squat rack allows you to easily attach spotter arms that extend outward. This is a game-changer for progressing past dumbbell exercises for breast lift. You can set up an adjustable bench inside the rack, set the safety spotter arms just below your chest cavity, and safely perform heavy barbell incline presses to absolute failure without a spotter.
"When lifting without a partner, safety arms are non-negotiable. The Mayo Clinic Strength Training Guide emphasizes that utilizing mechanical safeties prevents catastrophic crush injuries during solo bench pressing or squatting."
Pricing & Dimensions: Expect to spend between $450 and $700 for a high-quality 4-post half rack (like the Titan T-2 or Rogue S-2). The footprint usually expands to 48" x 48" or 48" x 60", requiring slightly more depth than a squat stand to accommodate the bench and spotter arms.
Step 3: The Power Rack (The Solo Lifter's Safe Haven)
The power rack (or power cage) is a fully enclosed, four-to-six-post steel cage. It is the gold standard for home gyms, offering unparalleled safety and versatility. If your goal is to maximize upper chest hypertrophy safely over the next decade, this is your ultimate destination.
Key Advantages for Pectoral Training
- Pin-Pipe Safeties or Strap Safeties: Unlike spotter arms on a half-rack, a power rack allows you to set safety bars across the entire width of the cage. If you fail a rep on a heavy flat or incline bench press, you simply lower the bar onto the pins.
- Cable Pulley Attachments: Remember the biomechanics of the chest "lift" mentioned earlier? To achieve continuous tension on the clavicular pecs, cable crossovers are superior to dumbbell flies (which lose tension at the top of the movement). Most modern power racks offer optional lat-pulldown and functional trainer attachments, turning your rack into a complete chest-isolation station.
- Landmine Attachments: Landmine presses are exceptional for building the upper chest while sparing the shoulder joints from the impingement risks associated with heavy dumbbell kick-ups.
The Trade-off: Power racks are massive. A standard cage requires a footprint of at least 48" x 48", but with spotter arms and a bench, you need a dedicated 8' x 8' clear space. Pricing for a reliable 2x2 or 3x3 power rack (such as the REP Fitness PR-1100 or Titan T-3) ranges from $500 to $850, not including the cost of attachments.
Comparison Matrix: Footprint, Safety, and Cost
Use this matrix to determine which racking system aligns with your spatial constraints and training ambitions.
| Feature | Squat Stand | Squat Rack (Half-Rack) | Power Rack (Cage) |
|---|---|---|---|
| Average Footprint | 16 sq ft (4x4) | 20-25 sq ft (4x5) | 35+ sq ft (with bench/arms) |
| Solo Bench Safety | Poor (High tip risk) | Good (With spotter arms) | Excellent (Enclosed safeties) |
| Cable Attachment Options | None | Limited (Single lat pulldown) | Extensive (Dual functional trainers) |
| Estimated Cost (2026) | $350 - $500 | $450 - $700 | $500 - $900+ |
| Best For... | Garages with low ceilings & squats | Open-concept lifting & Olympic lifts | Heavy solo pressing & full-body hypertrophy |
Step 4: Programming Your Chest Progression
Once your rack is installed, you must transition your programming. The Cleveland Clinic notes that repetitive strain injuries often occur when lifters fail to adapt their form to new equipment. Here is how to transition from dumbbells to your new rack safely:
Phase 1: The Barbell Incline Press (Weeks 1-4)
Set your adjustable bench to a 30-degree incline. Set the power rack safety pins exactly 2 inches below your sternum. Focus on controlled eccentrics (3 seconds down). This builds the upper chest shelf without the shoulder instability of heavy dumbbells.
Phase 2: Pin Presses for Overcoming Isometrics (Weeks 5-8)
Set the safety pins at the midpoint of your press. Start the barbell from a dead stop on the pins and press upward. This eliminates the stretch reflex and forces the pectoralis major to generate pure concentric force, triggering new muscle fiber recruitment.
Phase 3: Cable Crossovers for the "Lift" (Ongoing)
If you invested in a power rack with functional trainer attachments, swap out your dumbbell chest flies for high-to-low cable crossovers. The cables provide constant mechanical tension throughout the entire range of motion, specifically targeting the sternal and clavicular intersections for maximum aesthetic development.
Frequently Asked Questions
Can I just buy heavier adjustable dumbbells instead of a rack?
Adjustable dumbbells typically max out at 50 to 90 lbs. While 90-lb dumbbells are heavy, the act of kicking them into position for an incline press places extreme torque on the biceps tendon and rotator cuff. A rack allows you to safely load equivalent or greater weight via a barbell or supported cables, bypassing the dangerous setup phase.
Do I need to bolt my rack to the floor?
If you purchase a Power Rack or a properly weighted Squat Rack, bolting is usually optional unless you are doing aggressive kipping pull-ups. However, if you opt for a lightweight Squat Stand, bolting to a wooden platform or using heavy rear weight-storage pegs as a counterbalance is mandatory to prevent tipping.
What hole spacing should I look for?
Look for "Westside" hole spacing (1-inch spacing in the bench press and squat zones) on the uprights. This allows you to micro-adjust your J-cups and safety pins with precision, ensuring the barbell clears your chest by a safe but optimal margin.
More gear to consider
All reviews
Barbell Collar Types & Dumbbell Chrome Set Troubleshooting
Dumbbell Upper Body Workout Female Lifters Outgrow: Barbell Guide

Rack Longevity: Storing the Biggest Dumbbell in the World

Olympic Barbell Knurling Guide & Alternating Dumbbell Press

Dumbbell Chest Exercises (No Bench): Rack Storage & Maintenance
