Power Rack vs Squat Rack: Proper Way to Do Dumbbell Curls Safely
Compare power racks, squat racks, and squat stands for your 2026 home gym. Plus, learn the proper way to do dumbbell curls using rack attachments.

The 2026 Home Gym Blueprint: Choosing Your Foundation
Building a resilient home gym in 2026 requires more than just throwing money at heavy iron. The centerpiece of any serious garage or basement gym is the rack system. Whether you are aiming to break a 400-pound back squat PR or isolate the biceps brachii for hypertrophy, your choice between a power rack, a half squat rack, and a squat stand dictates your safety, floor space, and exercise versatility. While most buying guides focus exclusively on compound barbell lifts, a well-chosen rack system also fundamentally changes how you execute isolation movements, providing the stable environment necessary to master the proper way to do dumbbell curls without relying on momentum or risking floor damage.
Head-to-Head Matrix: Power Rack vs. Squat Rack vs. Squat Stand
Before diving into specific models, it is critical to understand the structural differences between the three main categories. The terminology in the fitness industry can be murky, so here is the definitive breakdown based on post count, enclosure, and safety mechanisms.
| Feature | Power Rack (4-Post Enclosed) | Half Rack / Squat Rack (4-Post Open) | Squat Stand (2-Post) |
|---|---|---|---|
| Footprint | Large (48" x 48" or deeper) | Medium (48" x 48" base, open front) | Small (40" x 45" average) |
| Safety Mechanism | Internal catch pins & strap safeties | Front spotter arms (extended outward) | Spotter arms (extended outward) |
| Weight Capacity | 1,000 - 1,200+ lbs | 800 - 1,000 lbs | 500 - 800 lbs |
| Pull-Up Bar | Yes (Multi-grip standard) | Yes (Usually straight or angled) | Rare (Usually requires add-on) |
| Ideal For | Heavy solo lifting, full-body routines | Olympic lifts, kipping, space-conscious | Tight spaces, budget builds, light lifting |
Top-Tier Models & 2026 Pricing Breakdown
The market has matured significantly, with 11-gauge steel and 3x3 inch uprights becoming the baseline standard for premium home gym equipment. Here is how the top contenders stack up this year:
- Rogue RML-390F Power Rack: The undisputed king of the garage gym. Featuring 3x3 11-gauge steel, 1-inch Westside hole spacing through the bench and squat zones, and a 30-inch depth for ample interior room. Priced around $1,250 to $1,400 depending on the colorway and attachment bundles. You can view the full specs on the Rogue Fitness Monster series portal.
- Rep Fitness PR-4000: The ultimate modular system. The PR-4000 allows for 1-inch hole spacing add-ons and features a unique numbered upright system for easy attachment alignment. Expect to pay between $999 and $1,150.
- Titan Fitness T-3 Series: A budget-friendly workhorse that doesn't skimp on safety. While the finish and hardware quality are slightly below Rogue, the T-3 offers 3x3 uprights and a 36-inch depth for roughly $799.
- Rogue SML-2C Squat Stand: For those with strict spatial limitations, these 2-post stands offer a 90-inch height and 1,000 lb capacity for roughly $595, though they lack the enclosure required for advanced isolation setups.
Beyond Compounds: The Proper Way to Do Dumbbell Curls in a Rack
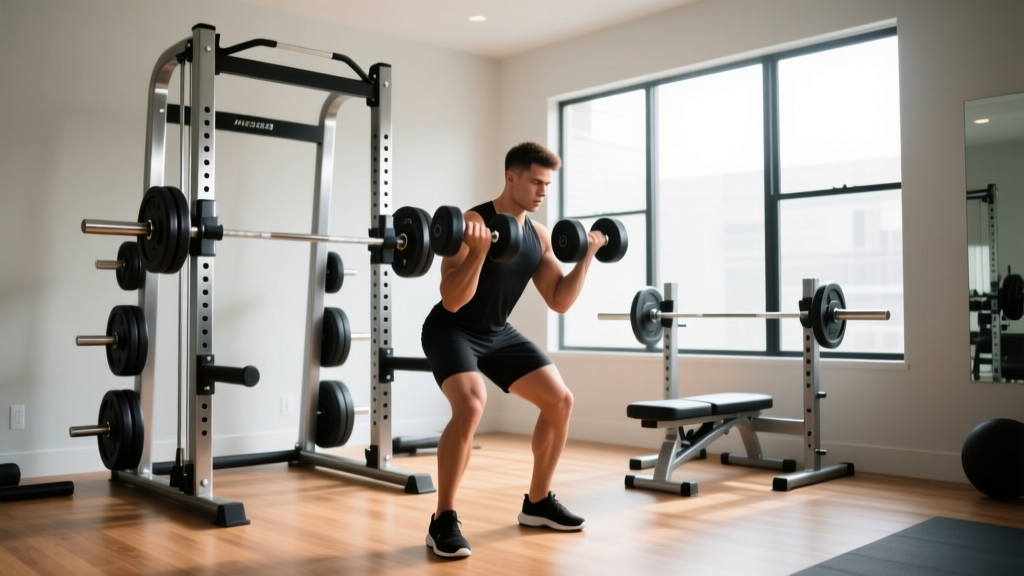
When lifters search for the proper way to do dumbbell curls, they are usually met with advice about elbow placement and supination. However, the environment in which you perform the curl is just as critical as the biomechanics. Standing in the middle of a garage gym invites cheating—using the hips, lower back, and shoulders to heave the weight up. Furthermore, dropping heavy 80lb or 100lb dumbbells onto rubber mats eventually degrades the flooring and the dumbbell handles.
The power rack offers an underrated, highly controlled environment for strict arm isolation. According to ExRx.net dumbbell curl biomechanics, eliminating shoulder flexion and torso sway is paramount for targeting the biceps brachii and brachialis without overloading the anterior deltoid.
Step-by-Step: The Seated Rack Curl Setup
To execute the proper way to do dumbbell curls using your power rack, follow this exact protocol:
- Position the Bench: Place a flat utility bench directly in the center of the power rack, facing the pull-up bar.
- Set the Safeties: Adjust the interior safety strap or pin-pipe safeties to roughly knee-height (just below where your elbows will rest when seated).
- The Execution: Sit on the bench with your dumbbells. Lean slightly forward, resting your triceps against your inner thighs, or rest your elbows directly on the UHMW-lined safety pins if they are set to the perfect height. This creates a makeshift preacher curl station.
- The Rep: Curl the weight while actively supinating the wrist (turning the pinky outward) at the top of the movement. Because you are enclosed in the rack and seated, zero momentum can be generated from the lower body.
- The Bail-Out: If you reach muscular failure, simply open your hands. The dumbbells will drop safely onto the interior safety straps, protecting your feet, your floor, and the dumbbell knurling.
Utilizing Rack Attachments for Arm Isolation
If you own a modular rack like the Rep PR-4000 or Rogue Monster series, you can expand your curl variations. Adding a rack-mounted preacher curl attachment (typically $125 to $175) locks your elbows into a fixed pad, enforcing the strictest possible form. Alternatively, utilizing a rack-integrated cable pulley system allows for constant-tension cable curls, which the National Strength and Conditioning Association frequently highlights as superior for continuous time-under-tension hypertrophy compared to free weights alone.
⚠️ FitGearPulse Safety Warning: Never perform standing heavy dumbbell curls outside of your rack if you are training to failure. A failed standing curl often results in the dumbbell swinging backward, risking severe elbow hyperextension or a crushed toe. Always contain heavy isolation failures inside the 4-post perimeter.Space, Budget, and Safety: The Decision Framework
How do you choose the right steel for your space? Use this 2026 decision matrix:
- Choose the Power Rack if: You train alone 100% of the time, you want to incorporate rack-based isolation (like the seated dumbbell curl method above), and you have a ceiling height of at least 90 inches. Budget: $1,000+.
- Choose the Half Rack if: You frequently perform Olympic lifts (cleans, snatches) where an enclosed cage would restrict your bar path, but you still want heavy spotter arms for squatting. Budget: $800 - $1,100.
- Choose the Squat Stand if: You are in an apartment, have a low ceiling (under 84 inches), or are on a strict sub-$600 budget. You must sacrifice pull-up capabilities and interior safety catch systems.
Final Thoughts on Rack Versatility
A power rack is not just a cage for squats; it is a comprehensive biomechanical laboratory. By leveraging the safeties, benches, and attachments within your rack, you can enforce the proper way to do dumbbell curls, protect your home gym flooring from catastrophic drops, and safely push past muscular failure without a spotter. Invest in 11-gauge steel, prioritize 1-inch hole spacing in the bench zone, and treat your rack as the ultimate tool for both heavy compounds and strict isolation.
More gear to consider
All reviews
Bumper vs Iron Plates: Full Body Dumbbell Compound Workout Trends

Beyond Dumbbells for the Pool: Barbell Collar Setup

Olympic vs Standard Plates: Setup & Dumbbell Slicey Guide

Bumper Plate vs Iron Plate Care: Plus Pepin Dumbbell Tips
EZ Curl vs Straight Bar: Layout Tips & Dumbbell Exercises Chart