Olympic vs Standard Plates: Gym Setup & Dumbbell Bear Crawl
Master your home gym installation with our Olympic vs standard weight plates guide, plus floor setup tips for the dumbbell bear crawl.

The Hybrid Home Gym: Bridging Heavy Lifts and Functional Floor Work
Building a comprehensive home gym in 2026 requires more than just bolting a power rack to the floor. It demands a strategic approach to equipment selection and spatial planning. Whether you are loading up a barbell for heavy squats or dropping to the floor to execute a dumbbell bear crawl, your choice of weight plates and your installation layout dictate both your safety and your performance. Many home gym owners make the critical mistake of mixing incompatible gear or failing to designate specific zones for dynamic movements. This complete setup and installation walkthrough will guide you through the nuances of Olympic versus standard weight plates, how to properly install your storage infrastructure, and how to configure your flooring to safely accommodate functional exercises like the dumbbell bear crawl.
The Core Decision: Olympic vs. Standard Weight Plates
Before you install a single storage peg, you must understand the mechanical differences between the two primary weight plate ecosystems. The distinction goes far beyond the center hole size; it impacts barbell whip, weight capacity, and the physical footprint of your gym.
Dimensional and Mechanical Breakdown
Standard weight plates feature a 1-inch (25mm) center hole and are typically paired with standard-threaded barbells. These bars are generally rated for a maximum static load of 200 to 250 pounds before they begin to suffer from permanent plastic deformation (bending). Standard plates are usually cast iron and max out at 25 or 30 pounds per plate, making them cumbersome for heavy loading.
Olympic weight plates, conversely, utilize a 2-inch (50mm) center hole. According to equipment specifications from Rogue Fitness, Olympic bars are engineered with high-tensile strength steel, routinely supporting 800 to 1,500 pounds. Furthermore, Olympic plates are available in specialized materials like urethane and crumb-rubber bumpers, which are essential for Olympic lifting and drop-safety.
| Feature | Standard Plates (1-inch) | Olympic Plates (2-inch) |
|---|---|---|
| Center Hole Diameter | 25mm (1 inch) | 50mm (2 inches) |
| Max Barbell Capacity | ~200 - 250 lbs | 800 - 1,500+ lbs |
| Material Options | Cast Iron, Vinyl-filled | Cast Iron, Urethane, Rubber Bumper |
| Average Cost (2026) | $1.00 - $1.50 / lb | $2.00 - $4.50 / lb |
| Rolling Hazard Profile | High (Small diameter edges) | Variable (Bumpers are flat, iron rolls) |
Step-by-Step Storage Installation Walkthrough
Mixing standard and Olympic plates on the floor is a severe tripping hazard, especially when transitioning to ground-level functional movements. Proper wall-mounted or freestanding installation is mandatory.
Installing a Wall-Mounted Olympic Plate Rack
If you are mounting a heavy-duty steel plate rack to a drywall or concrete wall, follow these exact structural steps to prevent catastrophic pull-out under load:
- Locate the Studs: Use a magnetic stud finder to locate the center of your wooden wall studs (typically spaced 16 inches on-center). For concrete walls, mark your drill points using a laser level.
- Pre-Drill Pilot Holes: For wood studs, drill a 7/32-inch pilot hole at least 3.5 inches deep. For concrete, use a 1/2-inch masonry bit and a hammer drill to a depth of 3 inches.
- Secure the Mounting Brackets: Use 3/8-inch x 3-inch structural lag screws (like GRK RSS) for wood studs, or 1/2-inch wedge anchors for concrete. Torque them down with an impact driver until the bracket is flush and immovable.
- Load Strategically: Always load the heaviest 45-lb Olympic bumpers on the bottom pegs to keep the center of gravity low. Store lighter 10-lb and 5-lb standard plates on upper accessory pegs.
Configuring the Floor Zone for Dynamic Movements
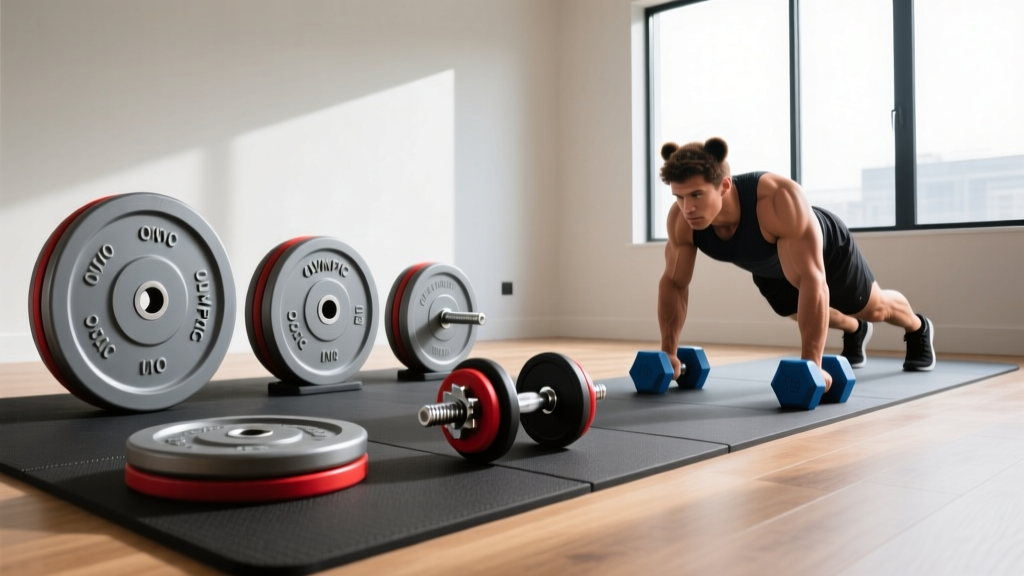
Once your heavy iron is safely stored, you must address the floor space. The dumbbell bear crawl is a highly effective, full-body conditioning exercise that requires you to grip dumbbells (or weight plates) while moving in a quadrupedal position. This movement demands specific flooring to protect both your joints and your equipment.
Selecting and Laying the Matting
Standard EVA foam puzzle mats are entirely insufficient for heavy free weights and dynamic crawling. They compress unevenly, causing wrist instability during the bear crawl. Instead, you must install 4x6 foot, 3/4-inch thick vulcanized rubber horse stall mats.
- Subfloor Prep: Ensure the concrete or wood subfloor is swept and completely dry. Moisture trapped under rubber mats will breed mold.
- Layout Pattern: Stagger the seams of your 4x6 mats in a brick-lay pattern. This prevents a continuous fault line from forming, which could pinch your fingers or toes during a bear crawl.
- Seam Securing: Use heavy-duty double-sided carpet tape specifically rated for rubber-to-concrete adhesion along the perimeter and seams to prevent the mats from sliding when you push off the dumbbells.
Executing the Dumbbell Bear Crawl in Your Setup
The biomechanics of the dumbbell bear crawl, as noted by functional movement guidelines from the American Council on Exercise (ACE), require immense core anti-rotation stability and shoulder girdle strength. Holding the dumbbells elevates the torso, increasing the range of motion and the demand on the stabilizing muscles.
Spatial Requirements and Equipment Selection
When performing this exercise in your newly configured gym zone, equipment geometry matters. If you are using weight plates instead of dumbbells for a plate bear crawl, you must use flat, urethane-coated Olympic grip plates. Standard round cast-iron plates are a massive rolling hazard; if you set your hand down slightly off-center, a standard plate will roll, leading to severe wrist sprains or facial impacts.
'The bear crawl is a primal movement pattern that exposes asymmetries in the kinetic chain. Adding external load via dumbbells or grip plates amplifies the neurological demand, making a stable, non-slip floor surface an absolute prerequisite for safety.' - Biomechanics and Functional Training Principles, ExRx.net
Step-by-Step Execution Protocol
- The Setup: Place two hex-head rubber-coated dumbbells (or 25-lb Olympic grip plates) shoulder-width apart on your vulcanized rubber matting.
- The Grip: Assume a push-up position, gripping the handles firmly. Ensure your knuckles are stacked directly over your wrists to maintain a neutral joint angle.
- The Crawl: Drive your opposite hand and foot forward simultaneously. Keep your hips entirely level—imagine balancing a standard 45-lb Olympic bumper plate on your lower back. If the plate would slide off, your hips are rotating too much.
- The Clearance: Ensure you have a minimum of 8 feet of linear clearance in your functional zone to complete at least four full cycles without having to stop and reset your grip near the wall-mounted plate rack.
Expert Troubleshooting & Edge Cases
Even with a meticulous installation, home gym owners encounter specific failure modes over time. Here is how to troubleshoot the most common issues related to plate storage and functional floor work.
| Issue | Root Cause | Expert Solution |
|---|---|---|
| Dumbbells sliding during bear crawls | Dust accumulation on rubber matting reducing friction. | Mop the vulcanized mats weekly with a pH-neutral cleaner and a microfiber mop to restore the rubber's natural tackiness. |
| Olympic plates rusting on the rack | High ambient humidity and bare cast iron exposure. | Wipe down bare iron plates with a silicone-based protectant or 3-in-One oil monthly. Upgrade to urethane-coated plates for zero-maintenance longevity. |
| Standard barbell bending | Exceeding the 200-lb yield strength of 1-inch bars. | Immediately retire the bent standard bar. Transition entirely to a 2-inch Olympic barbell system for any load exceeding 135 lbs. |
Final Thoughts on Gym Ecosystem Design
Designing a home gym is an exercise in spatial engineering. By understanding the distinct mechanical properties of Olympic versus standard weight plates, you can make informed purchasing decisions that protect your budget and your safety. Furthermore, by properly installing heavy-duty wall storage and laying down industrial-grade rubber matting, you create a versatile environment. This hybrid setup allows you to seamlessly transition from heavy, rack-based barbell lifting to dynamic, floor-based functional movements like the dumbbell bear crawl, ensuring your fitness space is as capable and resilient as you are.
More gear to consider
All reviews
Beginner Guide to Amazon Basics Neoprene Dumbbells for Home Workouts

Bumper vs Iron Plates: Care for Your Dumbbell Weight Lifting Routine

Barbell Collar Types Compared + 5 Day Dumbbell Workout PDF

Bumper vs Iron Plates: Cost Analysis & Deltoid Workout with Dumbbells

Bumper vs Iron Plates: Dumbbell Bench Braced Wrist Extension Trends