
Neoprene Dumbbell Setup & Dumbbell Shape Water Bottle Guide
Master your home gym setup with our walkthrough for neoprene dumbbells, rack installation, and organizing the viral dumbbell shape water bottle.

The Ultimate Home Free-Weight Zone Walkthrough
Building a dedicated free-weight zone in your home gym requires more than just buying iron and dropping it in the corner. As we move through 2026, the trend toward quiet, floor-friendly, and aesthetically pleasing workout spaces has made neoprene coated dumbbells the undisputed champion for home use. But a true professional setup encompasses the entire ecosystem: from the vulcanized rubber beneath your feet to the ergonomic accessories on your shelves, including the viral dumbbell shape water bottle that has taken over fitness spaces for its unique visual cues and functional grip.
This comprehensive installation and setup walkthrough will guide you through unboxing, spatial planning, rack assembly, and accessory integration, ensuring your home gym is safe, durable, and fully optimized.
⚠️ Critical Safety Warning: Neoprene Off-Gassing
Neoprene (polychloroprene) is a synthetic rubber that often traps manufacturing volatile organic compounds (VOCs) during the shipping process. Do not immediately move new neoprene dumbbells into a poorly ventilated bedroom or basement. Unbox them in a garage or well-ventilated area and allow them to off-gas for 48 to 72 hours before bringing them into your primary living space to prevent respiratory irritation.
Phase 1: Unboxing and Inspecting Your Neoprene Weights
When your neoprene dumbbell set arrives (popular 2026 models include the CAP Barbell Neoprene Hex series or Tone Fitness Pro sets), your first step is a rigorous quality inspection. Unlike bare cast iron, neoprene weights have specific failure modes you must check for upon arrival.
- Seam Integrity: Run your thumb along the molding seam where the two halves of the neoprene coating meet. Fraying or lifting at this seam indicates poor adhesive curing, which will lead to the rubber peeling off the iron core within months.
- Handle Knurling: Most premium neoprene dumbbells feature a solid steel or chrome-plated handle with medium-depth diamond knurling. Ensure the chrome is free of pitting, which can cause micro-abrasions on your palms during high-rep lateral raises.
- Weight Calibration: While commercial urethane plates are calibrated to within 10 grams, budget-friendly home neoprene dumbbells can have a variance of up to 3%. Use a digital luggage scale to verify the 15 lb and 20 lb pairs, as these are your most frequently used increments.
Phase 2: Floor Preparation and Mat Installation
Neoprene dumbbells are designed to be dropped, but your subfloor is not. The most common mistake in home gym installations is relying on interlocking EVA foam puzzle mats. EVA foam compresses permanently under the concentrated point-load of a dropped 35 lb hex dumbbell.
The 3/4-Inch Vulcanized Rubber Standard
For a permanent free-weight zone, install 4x6 foot, 3/4-inch thick vulcanized rubber horse stall mats.
- Clean the Subfloor: Sweep and degrease your concrete or plywood subfloor to prevent the rubber from trapping moisture and growing mold.
- Layout and Cut: Stagger the mat seams like brickwork. Use a utility knife with a hook blade and a straight edge to score and cut the rubber to fit your walls.
- Seal the Seams: Use a rubber mat seam tape or a flexible polyurethane adhesive to bind the edges, preventing dumbbells from rolling into the cracks and tripping you during walking lunges.
Phase 3: Assembling and Positioning the Weight Rack
A proper rack protects the neoprene coating from tearing against bare concrete and keeps your footprint organized. For home use, a 3-tier A-frame or horizontal tiered rack (such as the Yes4All Deluxe Wood or Steel Rack) is ideal.
Step-by-Step Rack Assembly
- Sort the Hardware: Lay out all M8x50mm carriage bolts, lock washers, and hex nuts. Do not skip the lock washers; the vibration from racking heavy weights will shake standard nuts loose over time.
- Assemble the Frame on the Mat: Build the rack directly on your rubber mat to ensure it settles into its final footprint. Hand-tighten all bolts first to allow the frame to self-square.
- Torque the Bolts: Using a socket wrench, tighten all bolts to approximately 15-20 Nm. Overtightening can strip the threads on budget steel racks or crack wooden tier supports.
- Positioning: Place the rack at least 24 inches away from any wall to allow for safe loading and unloading of the heavier dumbbells (typically 40-50 lbs) stored on the bottom tier.
Expert Insight: Always store your heaviest neoprene dumbbells on the bottom tier of the rack. This lowers the center of gravity, preventing the rack from tipping forward if you aggressively pull a 50 lb dumbbell from the shelf mid-workout. For comprehensive safety guidelines on home gym equipment placement, refer to the Consumer Product Safety Commission's sports and fitness safety guides.
Phase 4: The Hydration Station & Accessory Organization
A truly optimized 2026 home gym blends serious training gear with lifestyle accessories that promote consistency. Enter the dumbbell shape water bottle. Originally a viral novelty, this 2.2-liter (74 oz) BPA-free Tritan plastic bottle has become a staple in home gyms for two reasons: its ergonomic, thick-grip handle mimics the feel of a light dumbbell, and its massive visual footprint serves as a psychological cue to finish your daily hydration goals before your workout ends.
Integrating the Dumbbell Shape Water Bottle into Your Setup
Because of its unconventional, bulbous shape, the dumbbell shape water bottle does not fit in standard car cupholders or narrow rack shelves. Here is how to properly integrate it into your free-weight zone:
- The Top-Tier Display: Reserve the top tier of your 3-tier dumbbell rack exclusively for your 5 lb and 8 lb neoprene weights, leaving the center gap open. The dumbbell shape water bottle can sit securely in this cradle, keeping it off the floor and away from rolling heavy weights.
- Side-Mount Mesh Pouch: If you are using an A-frame rack, zip-tie a heavy-duty tactical mesh dump pouch to the side gusset of the rack. This creates a dedicated, drop-in hydration sleeve that accommodates the bottle's wide base without risking a mid-set spill onto your rubber mats.
- Sanitation Protocol: According to hydration and health guidelines outlined by the Mayo Clinic, reusable water vessels require daily cleaning to prevent bacterial biofilm buildup. Because the dumbbell shape water bottle has a narrow mouthpiece but a wide body, use a bottle brush with a flexible wire stem and a teaspoon of baking soda to scrub the interior corners weekly.
Phase 5: Setup Budget and Spatial Footprint Matrix
Planning your space and budget is critical. Below is a data matrix detailing the expected costs and spatial requirements for a complete neoprene dumbbell and accessory setup in a standard spare bedroom or garage corner.
| Setup Component | Estimated Cost (2026) | Spatial Footprint | Key Material Spec |
|---|---|---|---|
| Neoprene Dumbbell Set (5-50 lbs) | $350 - $550 | N/A (Stored on rack) | Polychloroprene / Cast Iron |
| 3-Tier Steel Weight Rack | $65 - $110 | 26" L x 15" W x 28" H | 14-Gauge Powder-Coated Steel |
| Vulcanized Rubber Mat (4x6) | $55 - $85 | 48" x 72" x 0.75" | Recycled Vulcanized Rubber |
| Dumbbell Shape Water Bottle (2.2L) | $18 - $28 | 12" H x 6" W (Base) | BPA-Free Tritan Plastic |
Maintenance and Long-Term Care
To ensure your investment lasts for years, implement a strict maintenance routine. Neoprene is highly resistant to moisture and sweat, but it is highly susceptible to UV degradation and harsh chemical cleaners. Never use bleach or ammonia-based glass cleaners on your dumbbells; this will dry out the synthetic rubber, causing it to chalk and crack. Instead, wipe down the neoprene and the chrome handles with a microfiber cloth dampened with a mild dish soap and water solution after every session.
For your accessories, including the dumbbell shape water bottle, avoid leaving them in direct sunlight or inside a hot car. UV exposure will not only fade the neoprene coating on your weights but will also cause the Tritan plastic of your water bottle to become brittle and prone to shattering if dropped on your rubber mats.
By following this complete setup and installation walkthrough, you will create a home gym environment that is not only structurally sound and safe but also tailored to the modern fitness lifestyle, seamlessly blending heavy-duty training tools with functional, motivational accessories.
More gear to consider
All reviews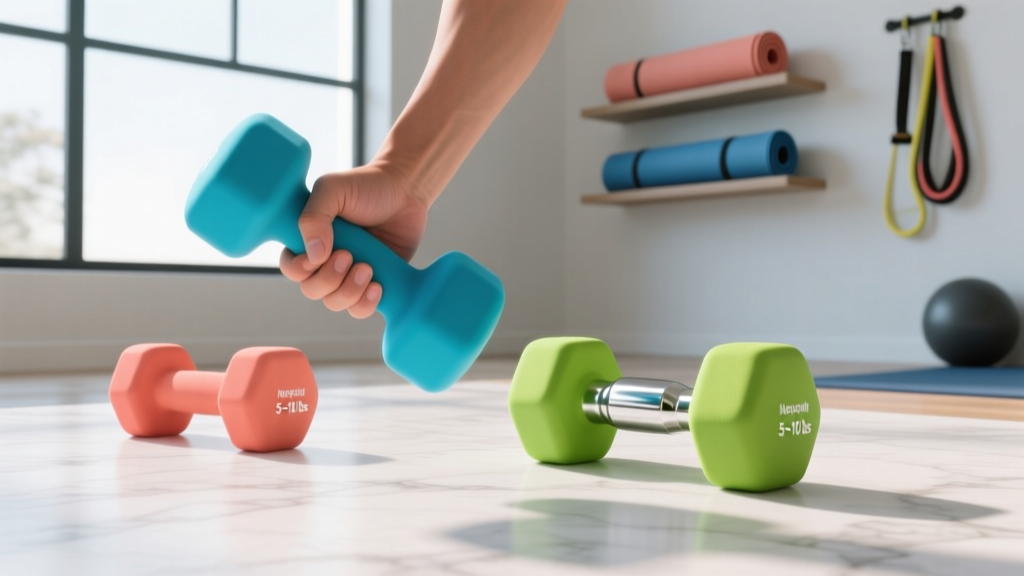
Beginner Guide to Dumbbell Scoops Using Neoprene Weights

Olympic vs Standard Plates: Does Size Affect Dumbbell Rows Form?

Loadable Dumbbell Maintenance for a Perfect Static Dumbbell Hold

Bumper vs Iron Plates: 2026 Trends & The Dumbbell Only Workout Plan

How to Pack Dumbbells for Moving: 2026 Bumper vs Iron Plate Trends
