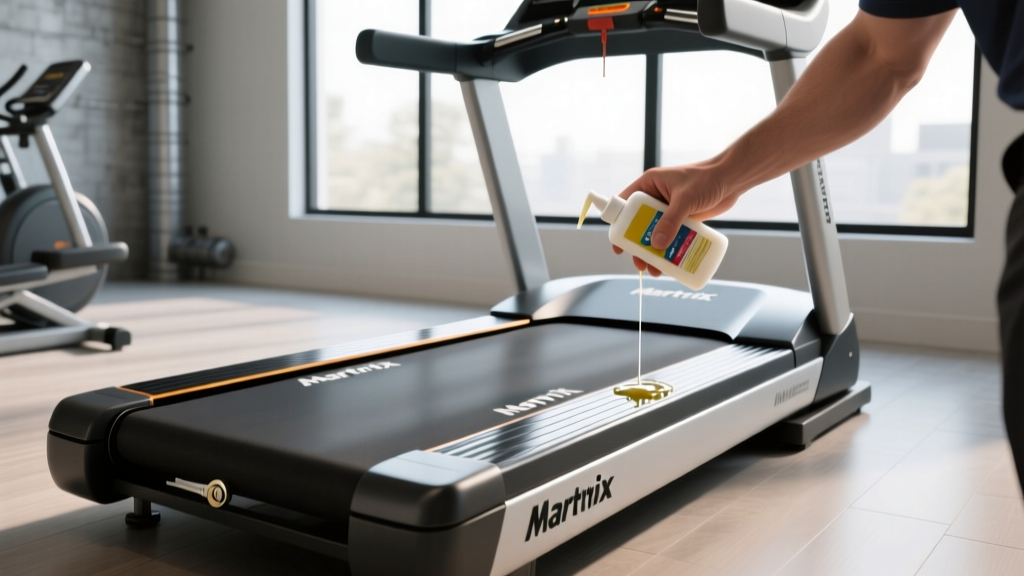
Matrix Treadmill How to Use and Maintain: Belt Lubrication Guide
Learn exactly how to maintain and lubricate your Matrix treadmill belt. Expert tips on tension, silicone application, and preventing motor failure.

Beyond the Basics: Matrix Treadmill How to Use and Maintain
Many beginners search for a 'matrix treadmill how to use' guide to understand the touchscreen console, heart rate telemetry, or incline motors. However, true equipment mastery extends far beyond the digital interface. Whether you own a home-series Matrix T3x, the robust T5x, or the commercial-grade T7x, the physical interaction between the walking belt and the deck is the single most critical factor in your machine's lifespan. As of 2026, Matrix Fitness continues to engineer some of the most durable drive systems on the market, but even a 4.0 HP Continuous Duty motor will fail prematurely if the belt-deck friction is ignored.
This comprehensive maintenance guide moves past basic assembly instructions and dives deep into the mechanical reality of treadmill belt lubrication, tension calibration, and deck preservation. By following these exact specifications, you can prevent catastrophic Motor Control Board (MCB) failures and ensure your Matrix treadmill operates silently for years.
The Hidden Cost of Friction: Why Belt Lubrication Matters
The walking belt on a Matrix treadmill slides over a high-density wooden deck coated in a low-friction phenolic resin. Over time, the factory-applied silicone lubricant degrades, dries out, or is pushed to the edges of the belt. When this happens, the coefficient of friction spikes.
From an electrical engineering perspective, increased physical friction forces the drive motor to draw more amperage to maintain your target speed. A properly lubricated Matrix T5x operating at 6.0 mph on a flat incline typically draws between 2 to 4 amps. A dry belt can push that amp draw to 8 to 12 amps. This sustained electrical overload generates excessive heat, eventually tripping the MCB's thermal protection or permanently blowing the MOSFET transistors on the board. Replacing a Matrix MCB and drive motor can cost upwards of $600 to $900 in parts and labor, whereas a bottle of silicone lubricant costs roughly $12.
⚠️ CRITICAL WARNING: Never use WD-40, petroleum-based oils, household grease, or silicone 'sprays' that contain propellants and petroleum distillates. These chemicals will melt the PVC backing of the walking belt and destroy the phenolic coating on the deck. You must use 100% pure liquid silicone designed specifically for fitness equipment.Identifying Your Matrix Belt and Deck Configuration
Before applying any lubricant, you must understand your specific machine's hardware. Matrix utilizes different deck technologies depending on the model tier:
- Home Series (T3x / T5x): These typically feature a fixed, wax-infused or phenolic-coated deck paired with a 2-ply commercial-grade walking belt. They require standard periodic liquid silicone lubrication.
- Commercial Endurance Series (T7x / T7xe): High-end commercial models often use reversible, high-density fiberboard (HDF) decks with specialized low-friction laminates. Some newer commercial belts are 'maintenance-free' (impregnated with a continuous dry lubricant), but the vast majority of Matrix units in home and light-commercial settings still require manual silicone application.
Pro Tip: Check your owner's manual or contact Matrix Fitness Official Support with your serial number (located on the front frame decal) to confirm if your specific belt is a standard or maintenance-free variant.
The 3-Point Belt Inspection Framework
Do not lubricate blindly. Perform this 3-point inspection every 90 days to determine if your treadmill actually needs service.
1. The Lift Test (Tension Check)
Reach under the center of the walking belt and lift it straight up. You should achieve exactly 2 to 3 inches of lift off the deck. If it barely lifts (less than 1.5 inches), the belt is over-tensioned, which will destroy the front roller bearings. If it lifts more than 4 inches, it is too loose and will slip underfoot.
2. The Slide Test (Friction Check)
With the machine off, stand on the side rails. Reach under the belt and slide your hand horizontally across the center of the deck. It should feel slick, almost like wet glass. If you feel dry wood, grit, or high resistance, lubrication is immediately required.
3. The Visual Edge Check
Inspect the left and right edges of the belt. If you see black rubber dust accumulating on the floor or the motor hood, the belt is misaligned and rubbing against the frame, or the belt is delaminating.
Step-by-Step Matrix Treadmill Belt Lubrication Guide
When the Slide Test indicates a dry deck, follow this exact procedure to restore optimal glide.
- Prep and Clean: Unplug the treadmill. Take a damp (not wet) microfiber cloth and wrap it around a yardstick or the manufacturer-provided cleaning wand. Slide it under the belt from the rear to the front on both sides to remove accumulated rubber dust and debris. Let the deck dry completely for 15 minutes.
- Loosen the Belt (Optional but Recommended): Using the provided Allen wrench, turn the left and right rear roller adjustment bolts counter-clockwise by exactly two full turns. This creates a gap for the lubricant.
- Apply the Silicone: Using a 100% pure liquid silicone applicator bottle, insert the nozzle under the center of the belt. Squeeze exactly 0.5 oz (half the bottle) in a zig-zag pattern from the center toward the front roller. Repeat on the opposite side.
- Restore Tension: Turn the rear roller bolts clockwise by the exact same amount you loosened them (two full turns) to return the belt to its baseline tension.
- Distribute the Lube: Plug the machine in. Start the treadmill at 2.0 mph. Walk on the belt, intentionally stepping heavily on the left and right edges to 'squeeze' the silicone across the entire width of the deck. Run the machine at 3.0 mph for 3 minutes without walking on it to allow the belt heat to spread the silicone evenly.
Matrix Treadmill Maintenance Schedule (2026 Standard)
Lubrication frequency is dictated by usage volume and user weight, not just time. Refer to the matrix below to establish your maintenance cadence. As noted by equipment maintenance standards outlined by the American Council on Exercise (ACE), proactive care reduces gym and home equipment downtime by over 40%.
| Usage Profile | Weekly Hours | Lubrication Interval | Belt/Deck Replacement Timeline |
|---|---|---|---|
| Light (Walking, < 180 lbs) | 1 - 3 hours | Every 12 months / 150 miles | 7 - 10 years |
| Moderate (Jogging, 180-220 lbs) | 3 - 7 hours | Every 6 months / 150 miles | 4 - 6 years |
| Heavy (Running, > 220 lbs) | 7+ hours | Every 3 months / 150 miles | 2 - 4 years |
Troubleshooting Common Matrix Belt Issues
Even with proper lubrication, mechanical anomalies can occur. Here is how to diagnose the two most common belt-related failures.
Belt Slippage vs. Motor Hesitation
If the belt stops for a microsecond when you plant your foot, you must determine if the walking belt is slipping or the drive motor is hesitating.
- The Chalk Test: Draw a line with white chalk across the front roller and the walking belt. Run the treadmill and step on it. If the chalk lines no longer align, the walking belt is slipping over the front roller. Fix: Tighten the rear roller bolts by 1/4 turn clockwise on both sides.
- The Drive Belt Check: If the chalk lines stay aligned, but the front roller itself is stopping, the issue is the internal drive belt (connecting the motor to the roller) or a failing motor capacitor. Fix: Remove the motor hood and check the drive belt for glazing or cracks. Replace if necessary.
Deck Grooving and Edge Wear
If you consistently run in the exact center of the treadmill without varying your foot placement, you will wear a physical 'groove' into the phenolic deck. Once the phenolic layer is breached and the raw wood is exposed, no amount of silicone will fix the friction issue. The deck must be flipped (if reversible) or replaced. To prevent this, consciously vary your lateral position on the belt during warm-ups and cool-downs.
Expert Tips for Maximizing Your Matrix Treadmill's Lifespan
'A treadmill is essentially a giant friction machine. Your goal as an owner is not to eliminate friction, but to manage it. The difference between a 5-year and a 15-year lifespan lies entirely in the microscopic layer of silicone between the belt and the deck.' — Senior Fitness Equipment Technician
Finally, ensure your Matrix treadmill is plugged directly into a wall outlet or a high-quality, treadmill-rated surge protector (minimum 4000 Joules). Standard power strips cannot handle the inductive load spikes generated by the drive motor when starting up, which can degrade the MCB over time. Combine proper electrical protection with strict adherence to this belt lubrication protocol, and your Matrix treadmill will remain a reliable cornerstone of your cardio routine for the long haul.
More gear to consider
All reviews
LifePro Pacer Folding Treadmill Belt Maintenance Guide

CrossFit Treadmill: Best Models, Workouts & Programming Guide

ProForm C950 Treadmill vs. Rivals: 2026 Feature Comparison Guide

AssaultRunner Pro Treadmill: Feature Comparison & Setup Walkthrough
Elliptical vs Aerobic Exercise Treadmill: Budget & Value Guide
