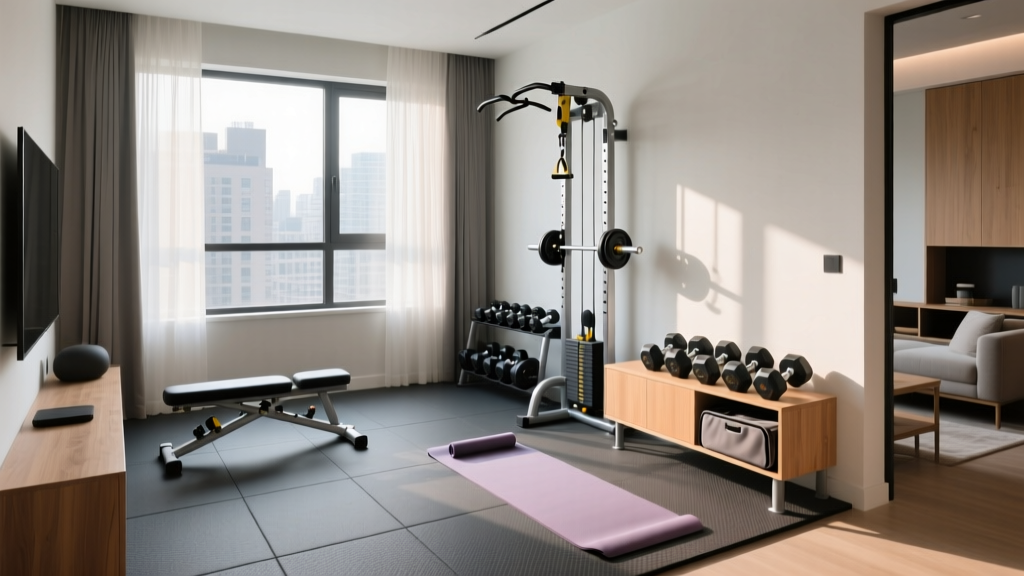
Making a Home Gym in a Small Apartment: Setup Guide
Learn the exact steps for making a home gym in a small apartment. Discover space-saving equipment, acoustic flooring, and noise-reduction installation tips.

The Reality of Apartment Fitness in 2026
When making a home gym in a small apartment or condo, the biggest mistake most renters and owners make is trying to shrink a commercial gym layout into a 10x10 foot spare bedroom. The modern approach to micro-space fitness requires a shift from a 'quantity of equipment' mindset to a 'density of utility' approach. With the latest advancements in adjustable resistance technology and modular wall-mounted rigs, you can build a complete strength and conditioning facility in as little as 36 square feet.
This complete setup and installation walkthrough will guide you through spatial mapping, acoustic decoupling, micro-footprint equipment selection, and tenant-friendly installation protocols. Whether you are dealing with low ceilings, shared walls, or strict HOA noise ordinances, this blueprint ensures your setup is both highly functional and neighbor-friendly.
Phase 1: Spatial Geometry and the 36-Square-Foot Rule
Before purchasing a single piece of equipment, you must map your 'sweat zone.' The minimum viable footprint for a comprehensive apartment gym is 6 feet by 6 feet (36 square feet). This specific dimension is not arbitrary; it is calculated based on the wingspan of an average adult male (roughly 72 inches) plus a 12-inch safety buffer on each side for dumbbell or kettlebell trajectories.
Clearance Requirements by Movement Plane
- Vertical Clearance: Standard apartment ceilings are 8 feet (96 inches). If you plan on doing overhead presses or pull-ups, you need a minimum of 7 feet 4 inches of clearance to avoid knuckle strikes on drywall or popcorn ceilings.
- HVAC Buffer Zone: Maintain at least 18 inches of clearance around all HVAC return vents. Blocking these during a high-intensity interval training (HIIT) session will suffocate the room's airflow and trigger localized humidity spikes.
- Door Swing Radius: If your gym is in a multi-use room, ensure the inward-swinging door has 32 inches of clearance so it does not strike a loaded dumbbell or adjustable bench.
Phase 2: Acoustic Decoupling and Vibration Control
The fastest way to face eviction or fines when making a home gym in a multi-family building is ignoring structure-borne noise. Dropping a 40-pound dumbbell on standard laminate flooring generates low-frequency vibrations that travel through the building's joists, sounding like a muffled explosion to the neighbor below.
Warning: Standard 1/2-inch EVA foam puzzle mats are entirely useless for impact noise reduction. They are designed for thermal insulation and light cushioning, not acoustic decoupling. Relying on them for heavy dumbbell drops will result in immediate neighbor complaints.The Apartment 'Acoustic Sandwich' Method
To properly isolate your floor, you need a dual-layer system that absorbs both airborne and impact noise. According to acoustic engineering standards, improving your Impact Insulation Class (IIC) rating requires mass and decoupling.
- Base Layer (Decoupling): Lay down a 1/2-inch high-density EVA foam or specialized acoustic underlayment (Cost: ~$1.50 per sq. ft.). This breaks the hard contact between the subfloor and your working surface.
- Top Layer (Mass): Install 3/4-inch vulcanized rubber mats. The industry standard is the 4x6 foot horse stall mat (Cost: ~$50-$70 per mat). Vulcanized rubber is dense enough to absorb the kinetic energy of a dropped kettlebell before it transfers to the foam layer below.
This two-layer sandwich reduces impact decibel transfer by up to 22dB, keeping you well within standard residential noise ordinances.
Phase 3: Micro-Footprint Equipment Selection
Space-saving gear has evolved significantly. Below is a comparison matrix of the most efficient apartment-friendly strength systems available, balancing footprint, cost, and installation requirements.
| Equipment Type | Specific Model (2026 Standard) | Footprint | Avg. Cost | Installation Req. |
|---|---|---|---|---|
| Smart Cable System | Speediance Gym Monster 2 | 4.5 sq. ft. (folded) | $1,499 | None (Freestanding) |
| Adjustable Dumbbells | Nuobell 80 lb Set | 1.2 sq. ft. | $649 | None |
| Wall-Mounted Rack | Rogue Fitness Fold-Away | 2.5 sq. ft. (folded) | $495 | Heavy (Stud mounting) |
| Adjustable Bench | Rep Fitness AB-3100 2.0 | 6 sq. ft. | $399 | None (Foldable) |
For renters who cannot drill into walls, the Speediance Gym Monster 2 paired with Nuobell dumbbells provides a complete hypertrophy and strength stimulus without requiring a single lag bolt. The Nuobells utilize a mechanical dial system that is significantly more durable and compact than the traditional selector-pin models of the past decade.
Phase 4: Wall-Mounting and Tenant Installation Walkthrough
If you own your apartment or have written permission to modify the walls, a folding squat rack like the Rogue Fold-Away is the ultimate space-saver. However, improper installation is a severe safety hazard. The Consumer Product Safety Commission (CPSC) strongly emphasizes the necessity of anchoring heavy, dynamic-load furniture and equipment directly into structural framing to prevent catastrophic tip-overs.
Step-by-Step Folding Rack Installation
- Locate Structural Studs: Apartment walls are typically framed with 2x4 wood studs or 20-gauge steel studs spaced 16 inches on-center. Use a high-quality magnetic stud finder to locate the exact center of two adjacent wood studs. Note: If you have steel studs, you must use specialized toggle bolts rated for dynamic sheer loads, as standard lag screws will strip the thin metal.
- Mark and Pre-Drill: Mark your mounting holes at 80 inches and 84 inches from the floor to ensure the pull-up bar clears your head. Pre-drill with a 3/16-inch wood bit to prevent the stud from splitting.
- Secure with Lag Bolts: Drive 3/8-inch x 3-inch structural lag screws through the rack's mounting brackets into the studs. Use a socket wrench, not a drill, for the final 10 rotations to ensure you do not overtighten and strip the wood.
- The Security Deposit Protocol: When you eventually move out, remove the rack and fill the 3/8-inch holes with DAP DryDex spackling. Once dry, sand with 220-grit paper and apply a sample-sized pot of matching interior paint. This $15 repair process will ensure your landlord cannot deduct from your security deposit.
Phase 5: Thermal Management and Air Quality
A 10x10 foot bedroom with a closed door will experience a rapid spike in temperature and humidity during a 45-minute workout. The Environmental Protection Agency (EPA) notes that poor indoor air circulation can lead to a buildup of CO2 and volatile organic compounds, which drastically increases perceived exertion and fatigue.
In a poorly ventilated 100-square-foot room, a single individual performing vigorous exercise can raise the ambient CO2 levels from a baseline of 400 ppm to over 2,500 ppm in under 30 minutes, leading to premature central nervous system fatigue.
The Cross-Breeze Configuration
Do not rely on a standard ceiling fan. You need directed, high-velocity airflow to facilitate sweat evaporation. Position a Vornado Air Circulator (Model 660) on the floor, angled upward at 45 degrees toward your primary workout zone. More importantly, you must create negative pressure: crack the room's window by two inches and place a standard box fan in the doorway facing outward. This exhausts the hot, humid air into the hallway (or outside), forcing fresh, cooler air to be pulled in from the window.
Final Walkthrough and Maintenance
Making a home gym in a small apartment is an exercise in precision. By respecting the 36-square-foot minimum, investing in a proper acoustic floor sandwich, selecting modular or adjustable equipment, and anchoring safely to structural studs, you create a sanctuary that rivals commercial facilities. Remember to wipe down your vulcanized rubber mats weekly with a pH-neutral cleaner to prevent the breakdown of the rubber compounds from sweat acidity, ensuring your micro-gym remains a permanent, high-performing fixture in your home.
For more foundational guidelines on weekly physical activity targets to structure your new apartment gym routines, refer to the CDC's Physical Activity Guidelines for Adults, which outline the optimal balance of cardiovascular and muscle-strengthening activities.
More gear to consider
All reviews
Best Flooring for Home Gym in Basement Apartments & Small Spaces

Shared Home Gym in a Garden Shed: The Ultimate Couples Guide

Belt Squat Home Gym Setup: Flooring & Ventilation Mistakes
Garage Gym Setup: Flooring, Ventilation & Mirror Installation Service

Compact Foldable Gyms vs. The Mark Wahlberg Home Gym
