How to Store and Maintain Your Set Dumbbell Rack for Longevity
Learn how to properly store and maintain your set dumbbell rack. Discover expert tips on rust prevention, weight distribution, and maximizing lifespan.

Investing in a commercial-grade set dumbbell collection is a significant financial commitment. In 2026, a high-quality 5-to-50-pound urethane or rubber hex set easily commands between $1,800 and $3,500, while the accompanying storage rack can add another $250 to $700 to the total. Yet, many home gym owners and commercial facility managers treat the rack as an afterthought. Improper storage doesn't just look messy; it actively degrades your equipment, leading to bent steel, peeling rubber, and rusted knurling.
Proper maintenance of your set dumbbell rack requires an understanding of structural load limits, material chemistry, and routine hardware inspections. This guide provides a deep-dive, expert-level framework for maximizing the lifespan of your storage solutions and protecting your free weight investment.
The Structural Physics of Weight Distribution
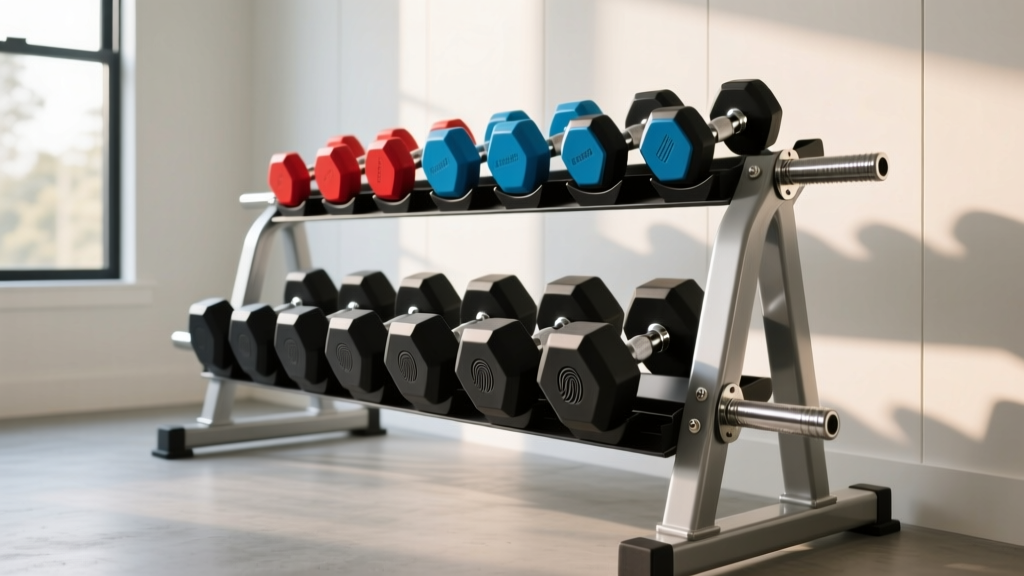
The most common failure mode for multi-tier racks is 'center-sag'—a permanent downward bowing of the steel cradle rails. This occurs when users ignore the engineered weight distribution of the rack. According to Rogue Fitness equipment specifications, standard 3-tier racks are designed with a specific load hierarchy: the top tier for lighter pairs (5–25 lbs), the middle for medium pairs (30–40 lbs), and the reinforced bottom tier for heavy pairs (45+ lbs).
Gauge Steel and Deflection Limits
Most premium racks, such as the Rep Fitness 3-Tier or the Rogue A-Frame, are constructed from 11-gauge or 12-gauge steel. While 11-gauge steel (approximately 0.1196 inches thick) offers superior rigidity compared to 12-gauge (0.1046 inches), neither is immune to deflection if overloaded. Placing a 50-pound set dumbbell pair on the top tier of a 12-gauge rack introduces a concentrated point-load that exceeds the yield strength of the unsupported span. Over a 12-to-18-month period, this causes micro-fractures in the welds and permanent plastic deformation of the steel rail.
⚠️ Critical Warning: Never store odd-shaped or oversized dumbbells (like thick-handled grip trainers or specialty hex bells) on standard tier rails unless the manufacturer explicitly rates the cradle width and load capacity for them. Overhanging weight shifts the center of gravity, creating a torsional twisting force that can snap spot-welds.Environmental Controls: Fighting Rust and Urethane Degradation
The environment in which your set dumbbell array is stored dictates the rate of chemical degradation. Garages and basements are notorious for fluctuating temperatures and high moisture levels, creating a hostile environment for both the steel rack and the dumbbell heads.
Humidity and Chrome Pitting
Chrome-plated handles and steel rack frames are highly susceptible to oxidation when relative humidity exceeds 60%. The Environmental Protection Agency (EPA) recommends maintaining indoor relative humidity between 30% and 50% to prevent mold and structural moisture damage. In a gym environment, keeping humidity below 50% is equally critical to prevent 'pitting'—a form of localized corrosion where microscopic craters form on the chrome surface, eventually ruining the knurling and making the handles feel sharp or gritty.
UV Exposure and Ozonolysis
If your gym features large windows, ultraviolet (UV) light and ambient ozone will slowly break down the polymer chains in rubber and urethane dumbbell heads. This process, known as ozonolysis, causes the rubber to dry out, chalk, and eventually crack. While urethane is significantly more UV-resistant than virgin rubber, prolonged direct sunlight will still degrade the material over a 3-to-5-year window. Always position your rack away from direct southern or western window exposure.
The Master Cleaning and Maintenance Matrix
Using the wrong cleaning agents is a fast track to destroying your equipment. Ammonia-based cleaners and harsh degreasers will strip the plasticizers out of rubber and urethane, causing them to melt or become brittle. Below is the definitive matrix for maintaining your set dumbbell storage system.
| Cleaning Agent | Best Use Case | Critical Warnings |
|---|---|---|
| Diluted Simple Green (1:10 ratio) | Removing chalk dust and sweat from the steel rack frame. | Never use full-strength. Do not apply directly to raw rubber heads. |
| 303 Aerospace Protectant | UV shielding and restoring moisture to urethane/rubber bells. | Do not apply to the knurled chrome handles or the rack's steel rails. |
| WD-40 Specialist Silicone | Lubricating squeaky rack joints or leveling foot threads. | Avoid standard WD-40, which leaves a sticky residue that attracts dust. |
| Microfiber + 3-in-One Oil | Polishing and protecting chrome handle shafts from rust. | Wipe thoroughly; excess oil on handles creates a dangerous slip hazard. |
Saddle and Cradle Upgrades: Protecting the Contact Points
The 'saddles'—the specific resting points where the dumbbell heads sit on the rack—are high-friction zones. Every time a user drops a 40-pound set dumbbell pair back into the cradle, the impact generates sheer force against the saddle material.
- Bare Steel Cradles: Found on budget racks. These will quickly scuff and tear the outer casing of rubber hex bells. Upgrade path: Apply heavy-duty UHMW (Ultra-High Molecular Weight) polyethylene tape to the contact rails.
- Rubber-Lined Saddles: Offer good initial protection, but cheap rubber liners compress and tear within 12 to 18 months of heavy commercial use, exposing the steel underneath.
- UHMW Plastic Saddles: The gold standard for premium racks (like those from Rogue and Rep Fitness). UHMW is incredibly dense, self-lubricating, and impervious to impact damage. If your rack didn't come with UHMW saddles, retrofitting them via bolt-on upgrades is the single best investment for preserving your dumbbell heads.
Hardware Inspections and the 'Wobble Test'
Vibration from dropping weights slowly backs out the fasteners holding your rack together. A loose rack isn't just annoying; it alters the geometry of the frame, placing uneven stress on the welds.
- The Wobble Test: Once a month, grip the top tier of the rack and apply moderate lateral force. If the rack shifts or clicks, the hardware is loose or the floor is uneven.
- Torque Specifications: Most commercial racks use M8x20mm or M10x25mm hex bolts for saddle and frame assembly. Using a calibrated torque wrench, tighten these bolts to 30–40 Nm (Newton-meters). Over-torquing can strip the internal threads of the welded nuts inside the steel tubing.
- Threadlocker Application: If you find yourself constantly re-tightening the same bolts, remove them, clean the threads with isopropyl alcohol, and apply a drop of Blue Loctite (Threadlocker 242). Never use Red Loctite on gym equipment, as it requires extreme heat to remove and will make future maintenance impossible.
Expert Troubleshooting: Common Storage Failures
Even with meticulous care, specific edge cases can arise when managing a set dumbbell storage system. Here is how to diagnose and resolve the most frequent issues reported by facility managers and home gym owners.
Issue: The Rack Wobbles on Uneven Concrete
Garage floors are rarely perfectly level. A wobbly rack causes dumbbells to rattle and shifts the center of gravity.
The Fix: Do not use cardboard or wood shims, which will compress and rot over time. Instead, install adjustable heavy-duty leveling feet (often sold as aftermarket accessories) or use high-density composite plastic shims designed for structural leveling. Ensure the rack's base plates are fully seated before tightening the floor anchors.
Issue: Rubber Dumbbells 'Melting' or Sticking to the Rack
Cheap, low-grade rubber dumbbells (often containing high levels of sulfur and plasticizers) can off-gas and become tacky, especially in hot environments exceeding 85°F (29°C). This causes them to literally fuse to the rack's steel rails or leave black residue.
The Fix: If your bells are already tacky, wipe them down with a mild degreaser and apply a UV protectant to seal the surface. However, the long-term solution is environmental control (keeping the room below 75°F) or upgrading to cast-iron hex bells or premium virgin urethane, which do not suffer from plasticizer migration.
"Facility safety and equipment longevity are inextricably linked. A well-maintained storage system not only protects the financial investment of the equipment but significantly reduces the risk of tripping hazards and structural failures in high-traffic training environments." — National Strength and Conditioning Association (NSCA) facility guidelines.
Final Thoughts on Longevity
Your set dumbbell rack is the foundation of your free weight organization. By respecting the load distribution limits of the steel gauge, controlling the ambient humidity to protect chrome and polymers, and adhering to a strict, chemically safe cleaning matrix, you can easily extend the functional lifespan of your storage system from a mere 3 years to well over a decade. Treat your rack with the same respect you give your barbell, and it will safely support your training for years to come.
More gear to consider
All reviews
Dumbbell Side Bend Good or Bad? Form Tips & Rack Layout Guide

EZ Bar vs Straight Bar: Space Layouts & Frontal Raises Dumbbell Guide

What Muscles Do Dumbbell Pullovers Work? EZ Curl Bar vs Straight Bar Guide

Olympic vs Standard Plates: Choosing the Right Weights with Dumbbells
What Is a Dumbbell Row Using Loadable Plates? 2026 Market Trends