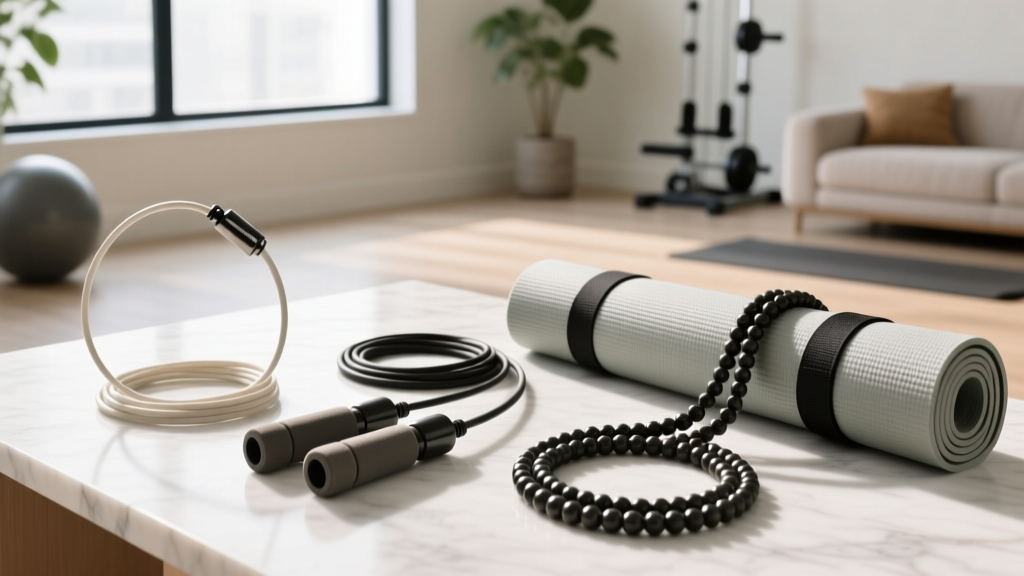
Jump Rope Types Troubleshooting & How to Strap a Yoga Mat
Fix common mistakes with speed, weighted, and beaded jump ropes. Plus, learn exactly how to strap a yoga mat for secure, damage-free transit.

The Hidden Costs of Gear Mismanagement
For hybrid athletes balancing high-intensity conditioning with mobility work, few things are more frustrating than equipment failure. Whether you are attempting double-unders or transitioning into a deep stretching flow, your gear must perform flawlessly. Yet, most fitness enthusiasts unknowingly destroy their equipment through improper storage, surface mismatching, and poor transit techniques. In this comprehensive troubleshooting guide, we will diagnose the most common failure modes across the three primary jump rope types—speed, weighted, and beaded—and conclude with a masterclass on how to strap a yoga mat to prevent edge delamination during your commute.
Speed Rope Troubleshooting: Kinks, Snaps, and Bearing Locks
Speed ropes, characterized by their ultra-thin bare steel cables or lightweight PVC coatings (typically 2.0mm to 2.5mm in diameter), are engineered for maximum RPMs. However, their delicate construction makes them highly susceptible to user error.
Mistake 1: The 'Tight Coil' Storage Method
Wrapping a bare steel cable tightly around your elbow and hand creates severe memory kinks. Once a steel cable kinks, the structural integrity of the wire strand is compromised, leading to micro-fractures that will eventually snap mid-workout.
- The Fix: Always store speed ropes in a loose figure-8 pattern or hang them vertically by the handle. If you must coil them, use the 'over-under' wrapping technique utilized by audio engineers to prevent cable twisting.
Mistake 2: Surface Mismatching
Using a bare steel speed rope (like the Rx Smart Gear Speed) on raw concrete or asphalt will shred the cable within 10,000 to 15,000 jumps. The friction literally files the steel away against the aggregate.
Expert Insight: If you frequently train outdoors, you must upgrade to a PVC-coated speed cable (approx. $15-$25 for replacement cords). The 85A durometer polyurethane coating acts as a sacrificial layer, extending outdoor cable life by up to 400%.
Mistake 3: Ignoring Bearing Maintenance
Premium speed ropes utilize 90-degree precision ball bearings inside the handle. When sweat, chalk, and dust infiltrate the bearing housing, the RPMs degrade, and the rope 'catches' during double-unders. Disassemble the handle cap every 60 days and apply a single drop of PTFE-based dry lubricant to the bearing axis.
Weighted Rope Failures: Handle Imbalance and Clip Detachment
Weighted ropes shift the kinetic load from the wrists to the shoulders and forearms, making them exceptional tools for building upper-body endurance. Systems like the CrossRope Get Lean Set (ranging from 1/4 lb to 2 lbs) use a quick-clip carabiner system to swap cables.
The Quick-Clip Failure Mode
The most common troubleshooting ticket for weighted ropes involves the quick-release clip failing to lock. This is rarely a manufacturing defect; it is almost always caused by chalk dust or lint jamming the internal spring gate.
- Inspect the carabiner gate for debris.
- Use compressed air to blow out the hinge pin.
- Never drop the handles on dirt or grass, as the open clip mechanism will act as a scoop for soil.
Biomechanical Troubleshooting: Shoulder Impingement
Many users experience anterior shoulder pain when transitioning from a 1/4 lb rope to a 1 lb or 2 lb rope. This is not a rope defect, but a technique flaw. Heavier ropes require a wider arm flare and a tighter, more controlled wrist flick. If you maintain the tight, elbow-pinned form used with speed ropes while swinging a 2 lb rope, the excessive torque will strain the rotator cuff. Widen your arm stance by 4 to 6 inches when moving up in weight classes.
Beaded Rope Breakages: Shattered Plastics and Tension Loss
Beaded ropes are the gold standard for beginners and freestyle trickers due to their tactile feedback and wind resistance. However, the polyurethane beads and internal nylon cord require specific environmental care.
Mistake: Cold Weather Brittleness
Standard 1-inch polyurethane beads become highly brittle in temperatures below 40°F (4°C). Striking a frozen gym floor or outdoor pavement in winter will cause the beads to shatter or crack down the center. If you train in cold climates, opt for 1.5-inch high-density HDPE beads, which retain their impact resistance in freezing temperatures.
Troubleshooting Internal Cord Slippage
Over time, the braided nylon cord inside the beads stretches, causing the rope to feel 'sloppy' and disrupting the rhythmic tap on the floor. To fix this:
- Pop off the plastic cap at the top of the handle.
- Pull the internal cord taut, leaving exactly 2 inches of slack inside the handle cavity (this prevents the cord from snapping under maximum tension).
- Retie the stopper knot using a double-overhand knot, ensuring it is wider than the handle's internal exit hole.
- Trim the excess cord and melt the nylon tip with a lighter to prevent fraying.
Comparison Matrix: Jump Rope Types & Failure Modes
| Rope Type | Primary Use Case | Common Failure Mode | Average Lifespan (Indoor) | Replacement Cost |
|---|---|---|---|---|
| Speed (Bare Steel) | Double-unders, CrossFit | Wire kinking, bearing lock | 6 - 12 months | $12 - $18 (Cable only) |
| Speed (PVC Coated) | Boxing, general cardio | Coating tearing at impact zone | 12 - 18 months | $15 - $25 (Cable only) |
| Weighted (1/2 lb+) | Strength, shoulder endurance | Clip gate jamming, cord stretch | 2+ years | $30 - $50 (Cable only) |
| Beaded (1-inch) | Beginners, freestyle tricks | Bead shattering, cord slippage | 1 - 2 years | $8 - $15 (Full rope) |
Gear Transit Guide: How to Strap a Yoga Mat Without Damage
Mastering your jump rope maintenance is only half the battle for the hybrid athlete. Transporting your gear—specifically high-end, closed-cell foam yoga mats—presents a unique set of challenges. A poorly secured mat will unroll in your car trunk, collect dirt, and suffer permanent edge damage. Here is the definitive guide on how to strap a yoga mat correctly to preserve your investment.
The Problem with Elastic Band Straps
Most premium mats (like the 6mm Manduka PRO or the 5mm Liforme) feature a dense polyurethane (PU) or natural rubber top layer. Using thin, elastic bungee cords or cheap nylon drawstrings creates extreme localized pressure. Over time, this pressure cuts into the mat's edge, causing the PU layer to peel and delaminate from the foam core.
The 1.5-Inch Webbing Rule
Always use a non-elastic, woven cotton or nylon sling strap that is at least 1.5 inches wide with a cam buckle. The wide surface area distributes the cinching force evenly across the rolled mat, preventing edge crushing. Avoid D-ring straps, as they require complex knotting and often slip during transit.
Step-by-Step: The Perfect Mat Cinch
- The Tight Roll: Begin rolling from the top edge (the side that faces up during practice) down to the bottom. This ensures that when you unroll it at the gym, the edges naturally lay flat against the floor rather than curling upward.
- The 1/3 Placement Rule: Do not place your strap loops dead-center on the mat. Instead, position the left loop exactly one-third of the way from the left edge, and the right loop one-third from the right edge. This prevents the outer thirds of the mat from flopping open and unrolling while walking.
- The Cam Buckle Tension: Pull the webbing through the cam buckle until you feel firm resistance. Stop pulling. If you overtighten the strap to the point where the foam core visibly compresses or creases, you are damaging the internal cell structure of the mat. The goal is to restrict unrolling, not to crush the foam.
- Handle Management: If your strap features a long shoulder pad, wrap the excess slack around the buckle mechanism so it doesn't drag on the ground or catch on car doors.
Integrating Ropes and Mats for Transit
Never wrap your jump rope around the outside of your strapped yoga mat. The metal carabiners on weighted ropes will scratch the PU surface, and bare steel speed cables can leave permanent dark scuff marks on light-colored natural rubber mats. Store all jump ropes in a dedicated microfiber drawstring pouch, and place that pouch inside your gym bag or slip it under the shoulder pad of your mat strap once the cam buckle is secured.
Final Thoughts on Gear Longevity
Troubleshooting your fitness accessories is an exercise in mindfulness. By respecting the material science of your speed cables, managing the kinetic loads of your weighted ropes, and learning precisely how to strap a yoga mat without compromising its structural integrity, you ensure that your gear supports your training rather than distracting from it. Invest in proper storage, match your equipment to your training surface, and your accessories will easily survive thousands of repetitions and miles of transit.
More gear to consider
All reviews
Exercise Ball Size Guide: Is Washing Yoga Mat in Washing Machine Safe?
Loop Band vs Tube Band: Best Picks for a Gym Bag That Holds Yoga Mat

Stability Ball vs BOSU Ball & Yoga Mat Thickness Chart
Resistance Band Sets: Levels, Types & Yoga vs Exercise Mat Pairings

Loop Band vs Tube Band & Fitness Mat vs Yoga Mat: 2026 Trends
