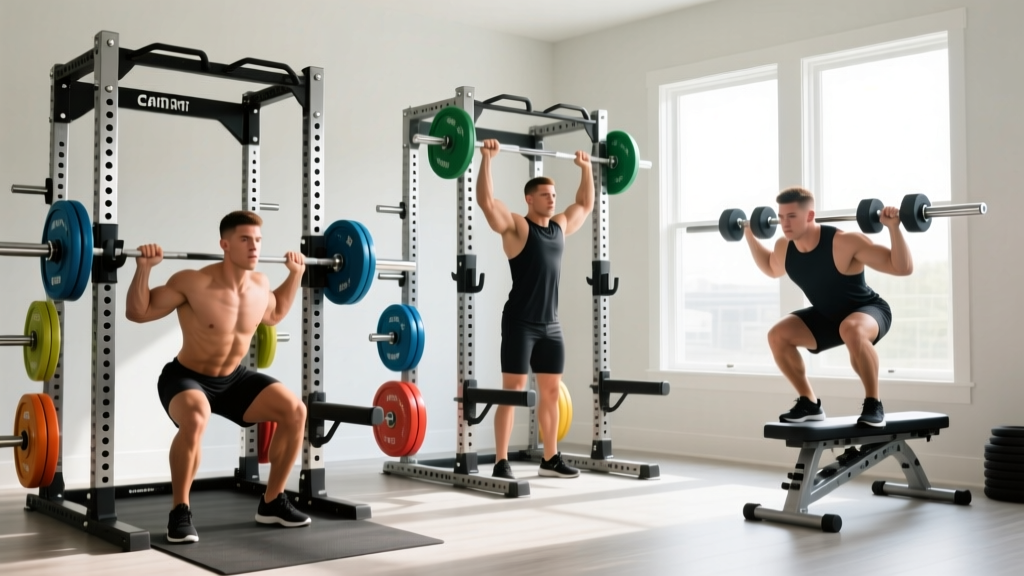
Power Rack vs Squat Rack vs Stand for HIIT Training with Dumbbells
Compare power racks, squat racks, and stands for HIIT training with dumbbells. Avoid common setup mistakes and optimize your home gym footprint.

The Hidden Anchor of Your Dumbbell HIIT Workouts
When programming high-intensity interval training, most athletes obsess over work-to-rest ratios, heart rate zones, and dumbbell weight increments. However, the physical anchor of your home gym—the racking system—is frequently an afterthought. This is a critical error. When you are performing HIIT training with dumbbells, your central nervous system is pushed to the brink of failure. Racking 60-pound dumbbells while gasping for air, or transitioning rapidly from a dumbbell thruster to a pull-up, demands specific spatial and structural requirements from your equipment.
Choosing between a full power rack, a half squat rack, or a minimalist squat stand is not just about barbell squats; it is about footprint management, dynamic movement clearance, and fatigue-state safety. In this 2026 troubleshooting guide, we break down the most common setup mistakes and help you match the right steel to your high-intensity programming.
⚠️ The #1 Setup Mistake: Treating your rack solely as a static barbell holder. For dumbbell HIIT complexes, your rack is a dynamic transition zone. Failing to account for a 6-foot "drop and move" radius around your uprights will result in bruised shins, tipped equipment, and compromised workout intensity.Defining the Contenders: Footprint vs. Functionality
Before troubleshooting specific failures, we must establish the baseline metrics for the three primary racking categories available on the 2026 market. The table below highlights how each system impacts high-intensity, multi-modal workouts.
| Equipment Type | Avg. Footprint (L x W) | Stability for Fatigued Racking | Pull-Up / Active Recovery Integration | 2026 Avg. Price Range |
|---|---|---|---|---|
| Full Power Rack (e.g., Rogue RML-390F) | 48" x 48" (16 sq ft) | Maximum (4-Point Base) | Excellent (Multiple Grip Angles) | $750 - $1,100+ |
| Half Squat Rack (e.g., Titan T-3 Half Rack) | 48" x 34" (11.3 sq ft) | High (Upright Stabilizers) | Good (Standard Front Bar) | $450 - $650 |
| Squat Stand (e.g., REP Fitness SR-4000) | 49" x 24" (8.1 sq ft) | Low to Moderate (2D Base) | Poor / Risky (Often Unbraced) | $200 - $350 |
Troubleshooting Common Setup Mistakes for Dumbbell HIIT
Even experienced home gym owners fall into predictable traps when configuring their space for high-intensity circuits. Here is how to troubleshoot the three most frequent errors.
Mistake 1: The "Squat Stand Tip" During Fatigued Transitions
The Scenario: You are performing a 40-second AMRAP (As Many Reps As Possible) circuit of dumbbell snatches and burpees. As the timer hits zero, you aggressively rack your 50-lb dumbbells onto the J-cups of your squat stand to transition to pull-ups.
The Failure Mode: Squat stands operate on a 2D plane. If your uprights are not bolted to the floor and lack a rear stabilizer bar, the forward momentum of dropping heavy dumbbells onto the pins can shift the center of gravity past the front base plate. According to biomechanical safety standards highlighted by the American Council on Exercise (ACE), fatigue severely degrades spatial awareness and motor control, making aggressive, off-center racking highly probable in the final rounds of a HIIT session.
The Fix: If you must use a squat stand due to space constraints, you must purchase a model with a rear crossmember stabilizer (like the Rogue Monster Lite Squat Stand 2.0) or bolt the front feet to a reinforced plywood platform. Never attempt kipping pull-ups or rapid weighted transitions on a freestanding 2D stand.
Mistake 2: Space Suffocation in the Garage Gym
The Scenario: You buy a full 48"x48" power rack because it feels like the "safest" option, placing it in the center of a 10x10 foot spare room.
The Failure Mode: HIIT training with dumbbells requires lateral and rotational movement space. Exercises like lateral skater jumps, dumbbell lunges, and renegade rows require a minimum of 6 feet of clearance in front of and beside your anchor point. A full power rack consumes 16 square feet of static space, plus another 36 square feet of swing clearance for the doors (if equipped). You have effectively suffocated your workout area, forcing you to modify or skip essential dynamic movements.
The Fix: Opt for a Folding Power Rack (e.g., Rogue R-3W or Titan X-3 Fold Back). When folded, these racks protrude only 4 to 6 inches from the wall, instantly returning 14 square feet of floor space to your gym for dumbbell floor work and agility drills.
Mistake 3: Ignoring Upright Hole Spacing for Drop Sets
The Scenario: Your HIIT protocol includes mechanical drop sets (e.g., heavy dumbbell floor presses immediately followed by dumbbell glute bridges). You need to adjust the spotter arms or J-cups rapidly.
The Failure Mode: Standard 2-inch or 3-inch hole spacing forces you to make micro-adjustments that waste precious seconds and break your heart-rate zone. Furthermore, standard bare steel J-cups will tear up the knurling on your dumbbell handles if you temporarily rest them on the pins between intervals.
The Fix: Ensure your chosen rack features Westside Hole Spacing (1-inch spacing in the bench and press zone). Additionally, upgrade to UHMW (Ultra-High-Molecular-Weight) plastic-lined J-cups. This protects your dumbbell handles and deadens the acoustic impact of dropping weights during high-fatigue transitions.
Expert Insight: "The physiological demands of HIIT rely on incomplete recovery. If your equipment transition takes longer than 10 seconds due to poor rack geometry or spatial bottlenecks, you are no longer doing HIIT; you are doing standard circuit training. Equipment must facilitate speed, not hinder it."
The "Dumbbell HIIT" Decision Matrix
Use this step-by-step diagnostic flow to determine which racking system matches your specific training environment and programming style.
- Step 1: Measure the Dynamic Zone. Do you have at least an 8x8 foot clear area?
- Yes: Proceed to Step 2.
- No: You must use a Wall-Mounted Folding Rack or a Squat Stand with a Stabilizer Bar.
- Step 2: Assess Pull-Up Integration. Does your HIIT programming include strict or kipping pull-ups as active recovery between dumbbell sets?
- Yes: Eliminate Squat Stands. Choose a Half Rack or Full Power Rack for 4-point base stability.
- No: Proceed to Step 3.
- Step 3: Evaluate Dumbbell Storage Needs. Do you use adjustable dumbbells (e.g., Nuobell, PowerBlock) that cannot be dropped on the floor, requiring a rack-attached shelf?
- Yes: A Half Squat Rack is ideal, as the rear uprights allow for safe, integrated weight horn or shelf storage without expanding the footprint.
- No: A heavy-duty Squat Stand is sufficient for occasional barbell complexes and dumbbell resting.
Real-World 2026 Gear Configurations
To ground these concepts in reality, here are three optimized setups based on current market availability and pricing.
Configuration A: The Apartment HIIT Setup (Space-Constrained)
- Core Gear: Titan Fitness T-3 Series Folding Power Rack (43"x43" footprint when open, 4" when folded).
- Why it Works: Allows for heavy dumbbell rack-supported split squats and pull-ups, then folds away to open up the living room floor for dumbbell burpees and mountain climbers.
- Estimated Cost: $550 - $650.
Configuration B: The Garage Complex Setup (High-Volume)
- Core Gear: REP Fitness PR-4000 Power Rack (3x3 uprights, Westside spacing).
- Why it Works: The 3x3 uprights allow for the attachment of a landmine base. Landmine rotational presses paired with heavy dumbbell lunges are a staple of functional HIIT. The 4-point base guarantees zero tipping during aggressive landmine or dumbbell drop-sets.
- Estimated Cost: $899 - $1,100 (with attachments).
Configuration C: The Minimalist Stand (Budget & Footprint)
- Core Gear: Rogue Monster Lite Squat Stand 2.0 (with rear stabilizer).
- Why it Works: It provides the safety of a braced base without the visual or physical bulk of a full cage. Perfect for athletes who primarily do floor-based dumbbell HIIT but need a safe place to rest heavy bells or perform strict pull-ups.
- Estimated Cost: $395 - $450.
Safety Protocols for High-Fatigue Racking
Research published in the National Center for Biotechnology Information (NCBI) demonstrates that high-intensity interval protocols induce rapid neuromuscular fatigue, significantly altering proprioception and grip strength in the final minutes of a bout. When applying this to HIIT training with dumbbells, the act of "racking" becomes a high-risk event.
To mitigate injury and equipment damage, implement the following protocols:
- The "Controlled Descent" Rule: Never drop dumbbells onto J-cups from shoulder height during a HIIT timer. Even with UHMW plastic, the sheer force can bend standard 5/8" hardware pins. Lower them under control to the cup.
- Use Rack-Mounted Dumbbell Trays: If your budget and rack profile allow, attach a vertical dumbbell tray to the uprights. This eliminates the need to bend over to the floor to retrieve your next set of dumbbells, keeping your heart rate elevated and saving your lower back from repetitive flexion under fatigue.
- Active Recovery Positioning: As recommended by the American College of Sports Medicine (ACSM), active recovery is crucial for lactate clearance. Position your pull-up bar or assault bike exactly one step away from your dumbbell drop zone to ensure seamless transitions without breaking the interval timer.
Ultimately, the right rack for your dumbbell HIIT workouts is the one that disappears into the background of your workout. It should offer unyielding stability when you are exhausted, provide the exact clearance your dynamic movements require, and respect the physical boundaries of your training space. Evaluate your footprint, respect the physics of fatigue, and choose your steel accordingly.
More gear to consider
All reviews
Cast Iron vs Competition Kettlebells & Seated Deadlift with Dumbbells

Barbell Collar Mistakes: Female Dumbbell Weight Sets to Pro Clamps
Adjustable Dumbbell Setup for the Perfect Darebee Dumbbell Workout
Best Loadable Dumbbells for a Core Workout With Dumbbells
2026 Trend: Loadable Dumbbells for Easy Dumbbell Workouts at Home
