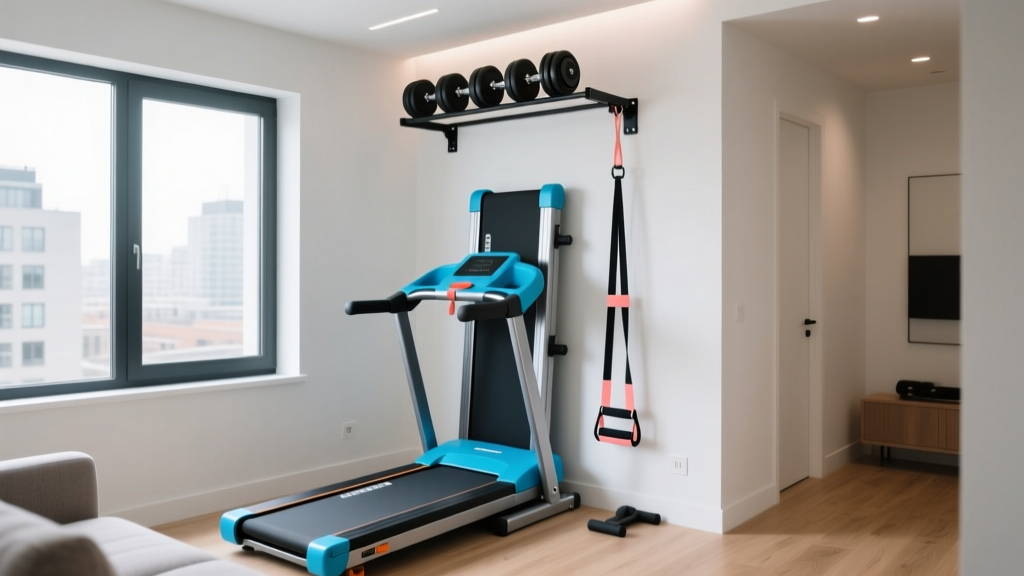
Essential Starter Kit: Optimizing Home Gym Dimensions
Discover the essential home gym starter kit for beginners. Learn how to optimize layouts, calculate exact home gym dimensions, and maximize small spaces.

The Spatial Reality: Why Dimensions Dictate Your Starter Kit
Building a home gym is an exciting step toward consistent fitness, but beginners often fall into a costly trap: purchasing equipment based on popularity rather than spatial reality. Before you invest in a sprawling power rack or a full set of fixed-weight dumbbells, you must confront the physical constraints of your environment. Understanding precise home gym dimensions is the foundational step in space optimization and layout design.
According to fitness facility planning guidelines, the average dedicated home workout space—often a spare bedroom, garage corner, or finished basement alcove—ranges between 60 and 120 square feet. When you are working within these parameters, every inch of footprint and vertical clearance matters. A beginner's essential starter kit must prioritize high utility and a minimal physical footprint, allowing for a full range of motion without turning your workout space into an obstacle course.
The Golden Rule of Clearance: Never measure just the equipment; measure the human in motion. A standard barbell is 84 inches long, but the operational width required to safely load plates and perform a deadlift is a minimum of 110 inches. If your room width is under 10 feet, a barbell is automatically excluded from your optimal starter kit.Minimum Home Gym Dimensions for Core Beginner Movements
To design an effective layout, we must map the biomechanical requirements of foundational exercises against your room's architecture. The following matrix outlines the absolute minimum clearances required for safe execution, factoring in limb extension and equipment sway. These metrics are critical when calculating your usable floor plan.
| Exercise / Movement | Primary Equipment | Min. Width | Min. Depth | Min. Ceiling Height |
|---|---|---|---|---|
| Goblet Squat / Lunges | Adjustable Dumbbells | 6 ft (72 in) | 6 ft (72 in) | 7 ft (84 in) |
| Dumbbell Chest Press | Flat Bench + DBs | 8 ft (96 in) | 4 ft (48 in) | 7 ft (84 in) |
| Overhead Press | Adjustable Dumbbells | 5 ft (60 in) | 3 ft (36 in) | 8 ft (96 in) |
| Suspension Rows | TRX / Anchor | 4 ft (48 in) | 8 ft (96 in) | 7 ft (84 in) |
| Standard Barbell Deadlift | 7ft Barbell + Plates | 9 ft (108 in) | 6 ft (72 in) | 7 ft (84 in) |
As highlighted by equipment testing experts at Garage Gym Reviews, beginners frequently underestimate the lateral space needed for dumbbell movements. When your arms are extended to the sides for a chest fly, a 6-foot wingspan is common. If your bench is pushed against a wall, you will strike the drywall before completing the range of motion.
The Space-Optimized Beginner Starter Kit (Under 100 Sq Ft)
Based on the dimensional constraints outlined above, the ideal beginner starter kit for small spaces eliminates fixed-weight racks and massive squat cages. Instead, it leverages modular, collapsible, and adjustable equipment. Here is the exact 2026 blueprint for a sub-100-square-foot layout, complete with specific model recommendations and pricing.
1. The Core Resistance: Nuobell 552 Adjustable Dumbbells
Fixed dumbbell racks require up to 12 square feet of dedicated floor space and cost upwards of $1,500 for a usable set. The Nuobell 552 Adjustable Dumbbells solve this spatial crisis. By utilizing a sleek twist-handle mechanism, they replace 15 sets of weights in a footprint of just 16.5 x 8 inches.
- Footprint: 1.8 sq ft (including the cradle)
- 2026 Pricing: ~$359 per pair
- Spatial Advantage: Unlike dial-based competitors that remain long even at light weights, Nuobells physically shrink in length as you reduce the weight, preventing the handles from hitting your thighs during lunges or goblet squats.
2. The Platform: Rogue Fitness Fold-Up Utility Bench
A standard weight bench is roughly 48 inches long and 18 inches wide, permanently consuming 6 square feet. The Rogue Fitness Fold-Up Utility Bench is engineered for spatial fluidity. When folded, it measures just 12 x 34 inches and can be hung on a wall bracket or slid under a bed.
- Operational Footprint: 4.5 sq ft (when deployed)
- Storage Footprint: 2.8 sq ft
- 2026 Pricing: $225.00
- Layout Tip: Position the bench at a 45-degree angle in the corner of your room during use. This diagonal placement maximizes limb clearance on both sides, adhering to the 96-inch width requirement for dumbbell presses.
3. The Vertical Pull: TRX PRO4 Suspension Trainer
Beginners often struggle to incorporate vertical pulling movements (like pull-ups) because standard doorframe pull-up bars require 30 inches of head clearance above the door, and ceiling-mounted rigs demand 9-foot ceilings. The TRX PRO4 utilizes a door anchor or a single overhead eye-bolt, requiring zero permanent floor space.
- Operational Footprint: 24 sq ft (requires an 8-foot radius for body angle)
- Storage Footprint: Negligible (stored in a 12 x 6 inch mesh bag)
- 2026 Pricing: $229.95
- Biomechanical Note: According to the American Council on Exercise (ACE), suspension training provides scalable resistance for beginners, allowing them to build latissimus dorsi and rhomboid strength without the spatial penalty of a lat-pulldown machine.
Layout Matrix: Mapping Your Floor Plan
Having the right equipment is only half the battle; arranging it to maintain optimal traffic flow is where layout design becomes critical. Follow this step-by-step framework to map your space.
- Identify the 'Dead Zones': Locate areas in your room that are unusable for equipment placement—directly in front of HVAC returns, behind door swings, or under sloped attic ceilings.
- Establish the 'Heavy Anchor': Place your heaviest, least movable item (the dumbbell cradle and bench) against the most structurally sound wall, ideally perpendicular to the entryway to maintain a clear sightline.
- Create the 'Active Corridor': Reserve a continuous 3-foot-wide pathway from the door to the primary workout zone. Never place adjustable equipment where dropping a weight could block your only exit.
- Utilize Vertical Real Estate: Install a heavy-duty pegboard above the dumbbell cradle to store resistance bands, lifting straps, and the TRX bag. This keeps the floor clear for dynamic movements like lunges.
Common Spatial Failure Modes (And How to Avoid Them)
Even with meticulous planning, beginners frequently encounter edge cases that disrupt their home gym dimensions. Anticipating these failure modes will save you from costly returns and drywall repairs.
The Ceiling Height Trap
Standard US residential ceilings are exactly 8 feet (96 inches) high. If you are 6 feet tall and perform a standing overhead dumbbell press, your hands will reach approximately 82 to 84 inches at the apex of the movement. Add the 5-inch diameter of the dumbbell head, and you are at 89 inches. You have only 7 inches of clearance. Failure mode: Striking the ceiling on the final, most difficult repetition, causing a loss of balance or drywall damage. Solution: Perform all overhead pressing movements seated on your utility bench to reduce your vertical profile by 18 to 24 inches.
The Door Swing Conflict
Interior doors typically swing inward into the room, consuming a 32-inch arc. Failure mode: Placing your dumbbell rack in the 'swing zone,' resulting in the door violently striking your equipment every time you enter. Solution: Remove the interior door from its hinges entirely, or install a heavy-duty tension rod and curtain to separate the space without sacrificing the swing arc.
Mirror Illusion and Depth Perception
Many beginners install wall-to-wall mirrors to make a small room feel larger and check their form. Failure mode: Backing up too far during a squat or deadlift and shattering the mirror with a dumbbell. Solution: Leave a mandatory 12-inch buffer zone between your mirror and your operational workout space. Use rubber horse-stall mats (typically 4x6 feet) to visually define the 'safe zone' where equipment is allowed to travel.
Finalizing Your Blueprint
Designing a functional workout space is an exercise in spatial geometry just as much as it is a commitment to physical health. By respecting your exact home gym dimensions and selecting an essential starter kit built for modularity and compact storage, you can achieve commercial-gym results in a fraction of the square footage. Measure twice, map your clearances, and invest in equipment that adapts to your room—not the other way around.
More gear to consider
All reviews
Marcy Home Gym MWM 4965SC vs Bowflex: Remodel Guide
Maintaining Marcy Home Gym Exercise Equipment in Small Spaces
Weider 8630 Home Gym: 2026 Market Trends & Garage Setup Guide

How Much Weight Do You Need for a Tiny Home Gym?

Harison Home Gym vs Competitors: Best Setup Under $500 (2026)