
Olympic Bar Setup: Knurling and the Dumbbell Straight Arm Pullback
Master your 2026 gym setup. This walkthrough covers Olympic barbell weight, knurling profiles, and rack spacing for the dumbbell straight arm pullback.

The Blueprint: Designing a Dual-Purpose Free Weight Bay
Building a comprehensive home gym in 2026 requires more than just purchasing heavy iron; it demands precise spatial engineering. A truly versatile free-weight zone must seamlessly transition between high-load axial movements, like heavy squats, and delicate, full-range isolation exercises. One of the most common setup failures occurs when lifters optimize their rack solely for barbell work, only to realize their spatial geometry completely ruins their ability to perform accessory movements. A prime example is the dumbbell straight arm pullback, an essential latissimus dorsi and serratus anterior developer that requires significant overhead clearance. This complete setup and installation walkthrough will guide you through selecting the right Olympic barbell based on weight and knurling, installing your rack, and engineering the exact spatial clearances needed for a fully functional training environment.
Step 1: Decoding Olympic Barbell Weight and Knurling
The centerpiece of your free-weight bay is the Olympic barbell. When evaluating an Olympic barbell buying guide, weight specifications and knurling profiles are the two most critical factors that dictate the bar's longevity and performance.
Weight and Tensile Strength
Standard men's Olympic bars weigh exactly 20kg (44 lbs) and feature a 28mm to 28.5mm shaft diameter, while women's bars weigh 15kg (33 lbs) with a 25mm shaft. For a primary home gym barbell in 2026, you must look at tensile strength, measured in PSI (pounds per square inch). A minimum of 190,000 PSI is required to prevent permanent deformation under heavy loads. The Rogue Ohio Bar (190k PSI, 28.5mm shaft) remains a gold standard, retailing around $295. If you plan on dropping the bar from overhead frequently, prioritize bars with composite bushings over needle bearings to reduce maintenance.
Knurl Aggressiveness: Matching Grip to Goal
Knurling is the machined pattern on the shaft that provides grip. According to StrengthLog's comprehensive guide to barbell knurling, the depth and shape of the knurl dictate how the bar feels in your hands. Choosing the wrong profile can lead to torn calluses during high-volume accessory work or slipped grips during heavy deadlifts.
| Knurl Profile | Shape Characteristics | Best Use Case | 2026 Market Example (Approx. Price) |
|---|---|---|---|
| Volcano | Peaks with a small crater in the center; grippy but not sharp. | Multipurpose, Olympic lifts, hypertrophy. | Rogue Ohio Bar ($295) |
| Mountain | Sharp, pronounced peaks with no crater; highly aggressive. | Heavy powerlifting, low-rep deadlifts. | Rep Fitness Excalibur ($320) |
| Hill | Rounded, shallow peaks; passive feel. | High-rep conditioning, beginners. | Frank's Training Bear Bar ($240) |
Pro-Tip: The Center Knurl Debate
If your setup includes heavy back squats, a center knurl helps the bar track against your shirt. However, if you frequently perform front squats or cleans, an aggressive center knurl will tear up your clavicle. For a dedicated home gym, a passive center knurl or a no-center-knurl design is overwhelmingly preferred in 2026 for daily comfort.
Step 2: Rack Installation and Spatial Geometry
Before you can map out accessory movements, the power rack or squat stand must be anchored. Most modern home gyms utilize 3x3-inch 11-gauge steel uprights. During assembly, ensure you are using the correct hole-spacing configuration.
- Standard Spacing: Holes are spaced 2 inches apart center-to-center. This is fine for general use but can make setting up J-cups for bench pressing frustrating.
- Westside Spacing: Holes are spaced 1 inch apart in the bench and squat zones. This is non-negotiable for serious lifters, allowing micro-adjustments for safety straps and J-cups.
Installation Note: If bolting your rack to a concrete floor, use 3/8-inch wedge anchors. Drill a 1/2-inch hole, clean the concrete dust out with a vacuum (crucial for anchor grip), and torque the nuts to 40 ft-lbs. If you are using a bolt-together rack on a rubber mat over a wood subfloor, use 3/4-inch Grade 5 hex bolts with fender washers, torqued to 150 ft-lbs to eliminate rack sway during re-racking.
Step 3: Engineering Clearance for the Dumbbell Straight Arm Pullback
Here is where most home gym layouts fail. The dumbbell straight arm pullback (often executed similarly to a pullover but with a strict straight-arm shoulder hinge to isolate the lats and stretch the thoracic cage) requires the lifter to lie supine on a flat bench. The lifter holds a single dumbbell with both hands, lowers it in a wide arc behind their head, and pulls it back to the starting position over the chest.
The Biomechanical Clearance Problem
During the eccentric (lowering) phase of the dumbbell straight arm pullback, the dumbbell travels approximately 18 to 24 inches past the top of the lifter's head, dropping just inches above the floor. If you place your flat bench inside a 4-post power rack with the head of the bench facing the rear uprights, the dumbbell will violently strike the steel crossmember or upright at the bottom of the movement. This not only ruins the stretch reflex but poses a severe injury risk to the shoulder joint and the rack's structural integrity.
The Setup Solution
To properly accommodate the dumbbell straight arm pullback, you must implement one of the following spatial configurations:
- The Perpendicular Placement: Position the flat bench inside the rack, but perpendicular to the uprights (parallel to the safety straps). This provides unlimited clearance behind the head, provided your rack's interior width is at least 43 inches. Ensure the bench is centered so the dumbbell clears the side uprights by at least 14 inches on either side.
- The Extended Platform Method: If you must place the bench parallel to the uprights, you need a minimum of 36 inches of clear floor space behind the head of the bench. This usually means pulling the bench entirely out of the cage and utilizing a standalone lifting platform or thick rubber horse-stall mats to protect the floor from the dumbbell's arc.
Step 4: Dumbbell Procurement and Rack Integration
To execute the pullback effectively, you need a dumbbell that allows for a secure two-handed grip on the inner handle. In 2026, hex-head urethane dumbbells remain the superior choice for home gyms. The flat edges prevent rolling, and the urethane coating dampens noise and protects floors. Look for dumbbells with contoured, medium-thickness handles (around 32mm to 34mm in diameter). If the handle is too thick (like some competition-grade 40mm handles), gripping a single dumbbell with both hands for the pullback will cause premature forearm fatigue, shifting the failure point away from the lats.
Store your dumbbells on a dedicated 3-tier A-frame or horizontal rack positioned at least 24 inches away from the main power rack to maintain clear walking lanes and prevent tripping hazards during heavy barbell sets.
Final Torque and Safety Verification Checklist
Before loading your newly selected Olympic barbell and attempting your first set of pullbacks, run through this final installation verification checklist:
- Hardware Check: Re-torque all rack bolts. Steel expands and contracts with seasonal temperature changes in garages; check torque every 6 months.
- J-Cup Alignment: Ensure both J-cups are set at the exact same Westside hole number. Uneven J-cups will cause the barbell to roll during unracking.
- Clearance Sweep: Lie on the bench in the exact position you will use for the dumbbell straight arm pullback. Hold a broomstick and simulate the full range of motion to visually verify 360-degree clearance from all steel uprights and safety straps.
- Knurl Maintenance: Brush your new barbell's knurling with a stiff nylon brush to remove factory oils and metal shavings before your first lift.
By meticulously selecting your barbell's weight and knurl profile, and respecting the spatial geometry required for isolation movements, your 2026 free-weight setup will be both brutally effective for heavy compounds and perfectly optimized for precise accessory work.
More gear to consider
All reviews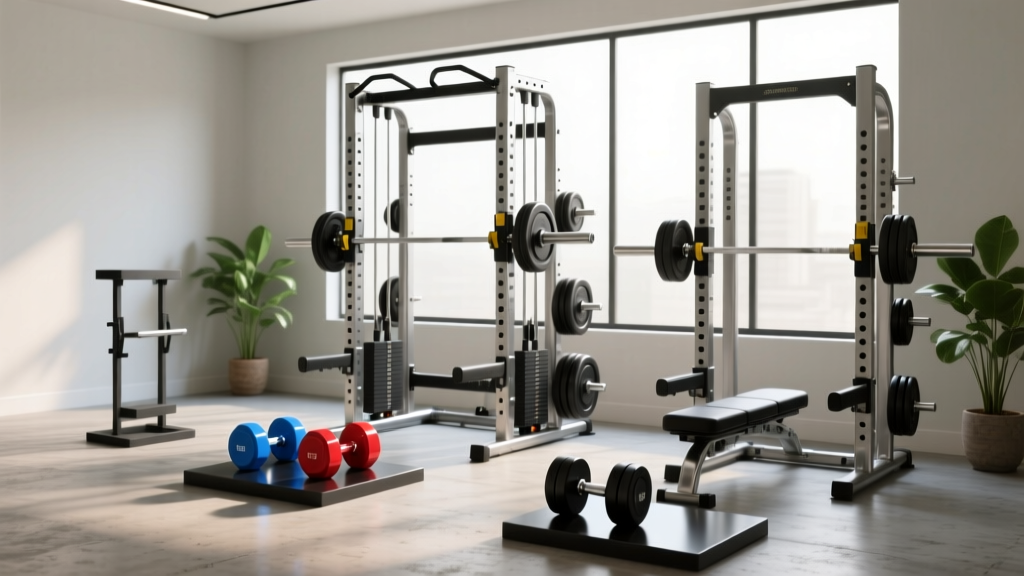
Power Rack vs Squat Rack vs Stand: Best Dumbbell Chest Exercise Setup

Kettlebell Care: Cast Iron vs Competition & Free Dumbbell Workout Plan

Best Dumbbell Racks to Organize Your Full Body Dumbbell Workout Plan

Cast Iron Kettlebell vs Competition: The Iron Dumbbell Alternative

Kettlebells vs Back and Biceps Dumbbell Exercises: Cast Iron Guide
