
Does a Treadmill Burn Fat? Walking Pad vs Treadmill Setup Guide
Discover if a treadmill burns fat vs a walking pad. Read our complete setup walkthrough, installation guide, and in-depth comparison review.

The Core Question: Does a Treadmill Burn Fat?
When outfitting a home gym or upgrading a home office, one of the most common questions we receive at FitGearPulse is: does a treadmill burn fat? The short answer is yes, but the physiological mechanism depends entirely on your heart rate zone, daily Non-Exercise Activity Thermogenesis (NEAT), and the specific equipment you choose. According to Harvard Health Publishing, steady-state walking at a moderate pace keeps your heart rate in 'Zone 2' (60-70% of your maximum heart rate), which is the optimal biological window for maximizing fat oxidation rather than burning glycogen.
However, the debate in 2026 is no longer just about buying a treadmill; it is about choosing between a traditional motorized treadmill and an under-desk walking pad. Both facilitate fat loss, but their spatial footprints, electrical requirements, and installation processes are vastly different. This guide provides a complete, expert-level setup and installation walkthrough for both machine types, ensuring your equipment is calibrated perfectly for safe, effective fat-burning workouts.
Expert Insight: Fat loss is a cumulative process. While a high-speed run on a traditional treadmill burns more calories per minute, a walking pad used consistently under a standing desk for 4 hours a day can yield a higher total daily fat burn due to sustained NEAT elevation.Walking Pad vs. Traditional Treadmill: 2026 Comparison Matrix
Before unboxing, you must understand the physical and electrical realities of your chosen machine. Below is a side-by-side comparison of two industry leaders: the Sole F80 Traditional Treadmill and the KingSmith WalkingPad R2 Pro.
| Feature | Sole F80 (Traditional) | KingSmith R2 Pro (Walking Pad) |
|---|---|---|
| Retail Price | $1,199.00 | $599.00 |
| Motor | 3.5 CHP Continuous | 1.25 HP Peak |
| Belt Dimensions | 22' x 60' | 17' x 43' |
| Unit Weight | 280 lbs | 65 lbs |
| Max Speed | 12 MPH (Sprint/Run) | 7.6 MPH (Brisk Walk/Jog) |
| Power Requirement | 120V / 20-Amp Dedicated | 120V / Standard 15-Amp |
Pre-Installation: Space, Power, and Floor Load Requirements
The most common point of failure in home cardio setup is ignoring environmental prerequisites. Follow this checklist before breaking the factory seal on your box.
- Electrical Circuitry: Traditional treadmills like the Sole F80 draw significant current, especially during the motor's startup surge. Plugging a 3.5 CHP treadmill into a shared 15-amp bedroom circuit will trip the breaker or degrade the motor control board over time. You must use a dedicated 20-amp circuit with 14-gauge or 12-gauge wiring.
- Subfloor Point-Load: A 280 lb treadmill plus a 200 lb user creates a dynamic point-load exceeding 500 lbs. If installing on a second-floor room with engineered wood or weak joists, position the machine perpendicular to the floor joists to distribute the weight.
- Impact Matting: Never place cardio machines directly on carpet or hardwood. Use a high-density rubber mat (minimum 3/8-inch thick, such as 4x6 horse stall mats from a farm supply store) to absorb acoustic vibration and prevent dust from being sucked into the motor housing.
Step-by-Step Setup Walkthrough: Traditional Treadmills
Setting up a full-size treadmill is a mechanical process that requires precision. Do not rush the console mast assembly, as this is where 90% of setup-related error codes originate.
Step 1: Base Positioning and Unboxing
- Cut the box straps and remove the top cardboard layer. Do not attempt to lift the deck out of the box; instead, tilt the box and slide the treadmill base onto your rubber mat.
- Remove the accessory box containing the console, uprights, and hardware packets. Lay them out on a soft surface to prevent scratching the console screen.
Step 2: Upright Mast Installation (The Critical Step)
- With a second person supporting the weight of the left upright mast, align it with the base hinge. Warning: Watch the internal data cables. These thin wires run through the center of the steel tube. If you pinch them between the steel bracket and the bolt plate, the console will fail to read the incline motor or heart rate sensors.
- Thread the data cable through the connector slot and snap it together firmly until you hear an audible click.
- Insert the four M10 carriage bolts and tighten them using a ratchet wrench. Torque to approximately 35 ft-lbs. Over-tightening can warp the steel bracket, causing the treadmill to wobble at speeds over 8 MPH.
Step 3: Console Mounting and Power-On
- Mount the console to the top of the uprights, securing the secondary data cable and the safety tether wire.
- Plug the machine into your dedicated 20-amp outlet and flip the red reset switch near the power cord to 'ON'.
- Stand on the side rails (not the belt), insert the magnetic safety key, and press 'Quick Start'. Allow the belt to run at 2.0 MPH for 3 minutes to distribute the factory silicone lubricant evenly across the deck.
'According to the U.S. Consumer Product Safety Commission (CPSC), improper assembly and lack of clear space behind the treadmill are leading causes of home gym injuries. Always maintain a minimum of 6 feet of clearance behind the rear roller to prevent severe friction burns in the event of a fall.'
Step-by-Step Setup Walkthrough: Walking Pads
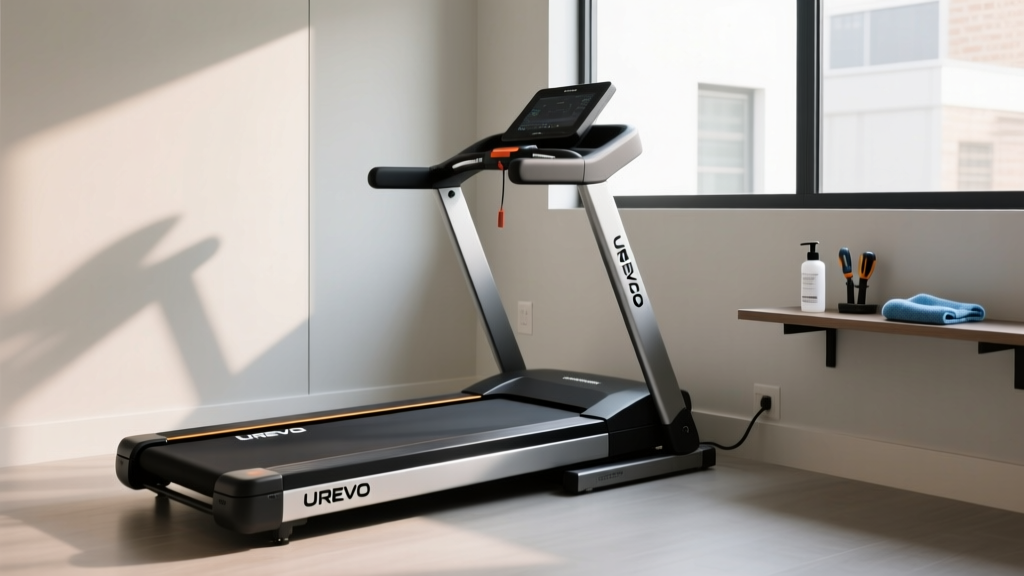
Walking pads like the KingSmith R2 Pro or the UREVO Strol 2E are designed for rapid deployment, but they still require specific calibration to ensure the belt tracks correctly under a standing desk.
Step 1: Unfolding and Handle Locking
- Lay the shipping box flat and slide the walking pad out. Because these units weigh between 55 and 75 lbs, lift with your legs, keeping the unit horizontal to prevent the internal motor oil from pooling incorrectly.
- Unfold the handrail (if applicable to your model). For the R2 Pro, rotate the aluminum handrail upward until the internal gas-struts lock into the 'click' position. Ensure the safety pin is engaged.
Step 2: App Pairing and Firmware Updates
- Download the manufacturer's companion app (e.g., the WalkingPad app or the UREVO app). Bluetooth pairing must be done while the machine is powered on and the belt is stationary.
- Check for firmware updates immediately. In 2026, most walking pads utilize over-the-air (OTA) updates to refine the 'Auto-Adaptive Speed' algorithm, which uses front-deck pressure sensors to speed up or slow down the belt based on your stride placement.
Step 3: Under-Desk Clearance Testing
- Slide the walking pad under your standing desk. Ensure there is at least 4 inches of clearance between the top of the handrail (or console) and the bottom of your desk keyboard tray.
- Verify that your desk chair's casters do not overlap the rear motor housing, which can block the cooling vents and trigger an overheat shutdown (Error Code E-04 on most generic PCBs).
Post-Installation Calibration: Belt Tension and Tracking
Whether you installed a $1,200 treadmill or a $300 walking pad, the belt must be calibrated after the first 5 hours of use. Factory tensioning is rarely perfect, and a loose belt will slip underfoot, ruining your Zone 2 fat-burn cadence and potentially burning out the drive motor.
How to Center and Tension Your Belt
- Identify Drift: Run the machine at 3.0 MPH. If the belt drifts to the left, the left rear roller is too loose.
- Adjust: Locate the hex-key bolts at the very back of the left and right rear end caps. Using the provided Allen wrench, turn the left bolt exactly one-quarter (1/4) turn clockwise. Never turn the bolts more than a quarter turn at a time.
- Test Tension: With the machine off, try to lift the edge of the belt in the middle of the deck. It should lift exactly 2 to 3 inches. If it lifts higher, it is too loose; if it barely lifts, it is over-tensioned and will cause excessive friction against the MDF deck.
Final Verdict: Which Machine Fits Your Fat-Loss Goals?
So, does a treadmill burn fat better than a walking pad? The machine itself does not burn fat; your metabolic response to the workload does. If your goal is high-intensity interval training (HIIT) or steep incline walking (up to 15% grades) to maximize post-exercise oxygen consumption (EPOC), a traditional treadmill like the Sole F80 is mandatory. The setup is rigorous, requiring dedicated electrical circuits and significant floor space, but the physiological ceiling is much higher.
Conversely, if your fat-loss strategy relies on accumulating 10,000 to 15,000 daily steps while working from home, a walking pad is the superior choice. The installation takes less than 10 minutes, requires no special electrical work, and seamlessly integrates into a sedentary workday, effectively turning dead time into active fat-oxidation time. Choose the setup that aligns with your spatial reality and your metabolic strategy.
More gear to consider
All reviews
Budget Breakdown: Stationary Bike Types & Silicone Oil for Treadmill

Curved Manual vs Motorized: Is a Welso Treadmill Best?

Home Stair Climber Guide: Avoiding Jump Rope vs Treadmill Mistakes

2026 Trend: ProForm Carbon Pro 2000 Treadmill vs Compact Cardio Gear
Space-Saving Layouts & UREVO Cyberpad Smart Treadmill Belt Care
