
Compact Storage Setup for Military Press Dumbbell Standing Workouts
Master small-space gym organization with our installation walkthrough for wall-mounted storage, optimized for military press dumbbell standing routines.

The Spatial Geometry of Small-Space Overhead Lifting
Designing a functional home gym in a tight 4x6 or 6x8 foot footprint requires ruthless spatial awareness. When your programming includes the military press dumbbell standing, floor clutter is not merely an aesthetic issue; it is a critical safety hazard. Unlike seated exercises, standing overhead pressing demands a wide, stable base, lateral elbow clearance, and an unobstructed vertical path. If your dumbbells are scattered on the floor or stored on a low A-frame rack that juts out 24 inches into your walking path, you are compromising both your stance and your safety.
According to the ExRx biomechanics database, the standing dumbbell shoulder press requires significant stabilization from the core and lower extremities, meaning your feet must be planted firmly shoulder-width apart. In a small room, this means your storage solutions must be entirely vertical and flush-mounted. This complete setup and installation walkthrough will guide you through transforming a blank 6-foot wall into a high-capacity, zero-footprint storage station specifically engineered to support standing overhead movements.
⚠️ CRITICAL CLEARANCE WARNING: Before purchasing equipment, measure your ceiling height. Standard residential ceilings are 8 feet (96 inches). If you are 5'9" with a 28-inch arm reach and a 12-inch dumbbell, your maximum overhead extension is 105 inches. You will hit the ceiling. For 8-foot ceilings, this storage setup integrates a fold-away bench to allow for seated pressing when standing clearance is mathematically impossible.Phase 1: Installing the Core Wall-Mounted Dumbbell Rack
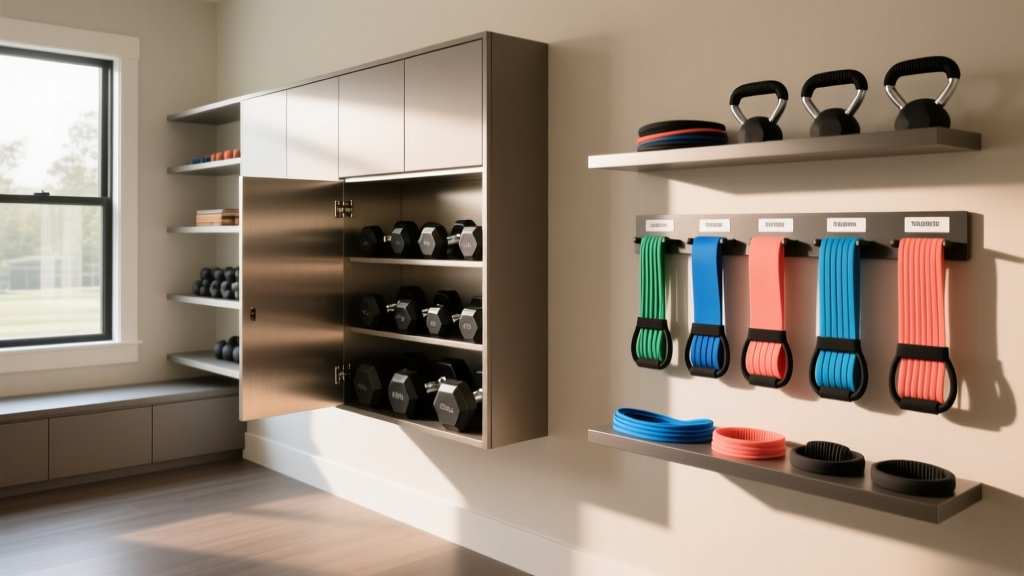
For small spaces, floor-standing racks are unacceptable. We are utilizing the Rogue Wall Mount Dumbbell Rack (approx. $145), constructed from 14-gauge steel with 12-inch cradle spacing. This unit holds up to 5 pairs of dumbbells and protrudes only 14 inches from the wall, leaving ample floor space for your standing stance.
Step-by-Step Structural Mounting
Wall-mounted storage must bear dynamic loads. A 50 lb dumbbell dropped onto a cradle generates hundreds of pounds of sheer force. Do not use drywall anchors.
- Locate and Mark Studs: Use a magnetic stud finder to locate the center of two wooden wall studs (typically spaced 16 inches on-center). The Rogue rack's mounting holes are designed to align with standard 16" or 24" stud spacing.
- Pre-Drill Pilot Holes: Using a 7/32" drill bit, pre-drill 3-inch deep pilot holes directly into the center of the studs. This prevents the wood from splitting when driving heavy lag screws.
- Select the Right Fasteners: Discard the generic hardware included with most racks. According to Simpson Strong-Tie structural fastener guidelines, you should use 3/8" x 3" Hex-Head Lag Screws with integrated washers for optimal shear strength in residential pine studs.
- Mount and Torque: With a partner holding the rack level, drive the lag screws using a socket wrench. Tighten until the 14-gauge steel backplate is flush against the drywall, but do not over-torque to the point of crushing the drywall paper.
- Load Testing: Before loading your full set, hang a 50 lb kettlebell from the center cradle to verify structural integrity.
Phase 2: Vertical Band and Accessory Integration
The space directly above the dumbbell rack is prime real estate for resistance bands, lifting straps, and grips. Installing a 24" x 18" steel pegboard directly above the rack keeps accessories visible and accessible without requiring you to bend down or step away from your lifting zone.
- Band Storage: Use 4-inch steel pegs to hang loop bands. Group them by resistance (e.g., red for 30lbs, black for 50lbs) from left to right.
- Hardware Bins: Mount a small magnetic parts tray to the side of the rack frame to hold collars, chalk, and small gym accessories that usually end up cluttering the floor.
The Overhead Clearance Matrix
When executing a military press dumbbell standing, understanding your exact vertical envelope is crucial. Use this matrix to determine if your room supports standing overhead work or if you must integrate a fold-away bench into your storage wall.
| User Height | Arm Extension + DB Height | Total Reach | 8'0" Ceiling (96") | 9'0" Ceiling (108") |
|---|---|---|---|---|
| 5'4" (64") | 36" | 100" | ❌ Fails (Needs Seated) | ✅ Passes |
| 5'9" (69") | 40" | 109" | ❌ Fails (Needs Seated) | ❌ Fails (Needs Seated) |
| 6'2" (74") | 44" | 118" | ❌ Fails (Needs Seated) | ❌ Fails (Needs Seated) |
Note: Total reach assumes a standard 12-inch dumbbell height and full elbow lockout. Adjustable dumbbells like the PowerBlock Elite (12" long but blocky) do not significantly reduce this vertical envelope.
Phase 3: Floor Matting and Stance Anchoring
Your storage setup is only half the battle; the floor beneath your standing press must provide feedback and stability. In a small room, thick interlocking foam tiles are a poor choice because they compress unevenly under heavy loads, compromising your balance during the military press dumbbell standing.
Pro-Tip: Install a single 4x6 foot, 3/4-inch thick vulcanized rubber horse stall mat (approx. $60). Cut it precisely to fit your alcove. The high-density rubber provides the exact coefficient of friction needed for aggressive foot drive without the squishiness of EVA foam.
To ensure the mat doesn't slide during heavy sets, apply double-sided carpet tape to the perimeter edges where the mat meets the baseboard. This keeps your lifting zone permanently defined and ensures your stored equipment remains the only variable in the room.
Real-World Troubleshooting & Edge Cases
What if my walls are masonry or concrete?
If you are converting a basement or garage with cinderblock walls, lag screws will fail. You must switch to 3/8" wedge anchors or sleeve anchors. Drill a 3/8" hole into the masonry using a hammer drill, clear the dust with compressed air, and tap the wedge anchor into place. Torque the nut to expand the wedge against the concrete. Refer to the Rogue Fitness equipment specifications for exact backplate hole diameters to ensure your anchor heads pass through.
Managing Vibration Transfer in Apartments
If your small space gym is in a multi-story apartment, dropping heavy dumbbells onto a wall-mounted rack will transfer acoustic shockwaves directly through the studs to your neighbor's wall. To mitigate this, place a 1/4-inch neoprene isolation pad between the steel backplate and the drywall before driving your lag screws. This decouples the steel rack from the wooden framing, reducing low-frequency vibration transfer by up to 60%.
Final Walkthrough Summary
By mounting your primary dumbbell storage vertically and integrating a dedicated accessory pegboard, you reclaim up to 12 square feet of floor space. This transformation is what makes the military press dumbbell standing viable in a micro-gym. Always prioritize structural fasteners over convenience hardware, respect your ceiling height limitations, and anchor your floor matting to create a permanent, safe, and highly organized training environment.
More gear to consider
All reviews
Weight Plate Trees & Vertical Dumbbell Storage: 2026 Guide

How To Match Normatec With Recovery Balls: A Practical Guide for Home Gym Storage & Functionality

Best Small Weight Rack for Home Gym: 2026 Space-Saving Guide
Beyond Hidden Dumbbell Storage: Resistance Band Organization

Theragun Homegym Space Budget Essentials: Smart, Scalable Setup for Recovery & Strength in Under 50 Sq Ft
