Bicycle or Treadmill Which Is Better? Setup & Feature Guide
Deciding between a bicycle or treadmill? We compare key features, space needs, and provide a complete home setup and installation walkthrough.

The Core Dilemma: Beyond the Calorie Burn
When fitness enthusiasts ask, 'bicycle or treadmill which is better?', the conversation usually revolves around joint impact or calorie expenditure. According to the Centers for Disease Control and Prevention (CDC), both machines easily fulfill the recommended 150 minutes of moderate aerobic activity per week. However, from a home gym logistics perspective in 2026, the real differentiator lies in spatial footprint, floor load bearing, and the sheer complexity of setup and installation.
A stationary bike is essentially a 'drop-and-go' appliance. A treadmill is a heavy, multi-part mechanical system that requires precise assembly, electrical considerations, and structural planning. This guide serves as your definitive treadmill buying feature comparison while providing a masterclass in setup and installation, ensuring you do not damage your $2,000 investment on day one.
Quick Decision Matrix: Bike vs. Treadmill- Choose a Bike if: You have under 10 sq. ft. of space, live on an upper floor with strict weight limits, or need a 15-minute assembly time.
- Choose a Treadmill if: You prioritize bone-density loading (weight-bearing exercise), have a dedicated 25+ sq. ft. ground-floor space, and want full-body kinematic movement.
Treadmill Buying Guide: Critical Feature Comparison
Before you unbox, you must buy right. The 2026 treadmill market is saturated with flashy touchscreens that mask underpowered motors. Here is the exact feature matrix you need to evaluate, contrasting high-end treadmills with premium indoor cycles.
| Feature | Premium Treadmill (e.g., Sole F80 / NordicTrack 1750) | Premium Indoor Bike (e.g., Schwinn IC4 / Peloton Bike+) |
|---|---|---|
| Footprint (L x W) | 75' x 35' (18+ sq. ft.) | 48' x 21' (7 sq. ft.) |
| Machine Weight | 220 - 350 lbs. | 100 - 140 lbs. |
| Motor / Resistance | 3.0 to 4.0 Continuous Horsepower (CHP) | Magnetic Resistance (Micro-adjustable) |
| Avg. Price Range | $1,200 - $3,500 | $900 - $2,500 |
| Setup Time | 1.5 to 3 Hours (2 People) | 20 to 45 Minutes (1 Person) |
The Non-Negotiable Treadmill Specs
If you decide the treadmill is the better fit for your goals, ignore 'Peak Horsepower' marketing gimmicks. You must look for Continuous Duty Horsepower (CHP). For walking, 2.5 CHP is sufficient. For running, you need a minimum of 3.0 CHP to prevent the motor from overheating and degrading the belt tracking. Furthermore, runners over 5'8' require a belt length of at least 60 inches; a 55-inch belt will force you to alter your natural stride, leading to hip and knee biomechanical issues over time.
The Complete Treadmill Setup & Installation Walkthrough
According to Consumer Reports, a significant percentage of early treadmill failures are tied to improper home assembly rather than factory defects. Follow this exact sequence to ensure your machine operates flawlessly.
Phase 1: Unboxing and Staging
- Do Not Lift the Box: A boxed treadmill weighs upwards of 250 lbs. Use a box cutter to slice the cardboard vertically on two sides and remove the box panels, leaving the machine resting on the wooden pallet or styrofoam base.
- Clear the Zone: Ensure you have a 10-foot clearance behind the treadmill. This is not just for safety; you will need this space to lower the deck during the uprighting process.
- Inventory with Intent: Separate the M8 and M10 bolts. Manufacturers often include two different lengths for the uprights. Using a 30mm bolt in a 25mm threaded hole will puncture the internal wiring harness.
Phase 2: The Upright Pivot (Critical Step)
This is where most DIY installations go wrong. The uprights house the delicate data cables that connect the motor controller to the console.
- Step A: Have your partner hold the uprights steady while you insert the bottom M10 bolts. Hand-tighten only.
- Step B: Locate the data cable. You will see small arrows on the plastic connectors. Align these arrows perfectly. Push them together until you hear a definitive 'click'. If you force a misaligned pin, you will bend the copper contact, resulting in a dead console or erratic speed surges.
- Step C: Carefully pivot the uprights into the base. Use a torque wrench to tighten the base bolts to roughly 15-20 Nm. Over-tightening will crack the plastic motor shroud.
Phase 3: Console Assembly and Cable Management
Mount the console mast to the uprights. Before tightening the final bolts, ensure the excess data cable is tucked into the designated channel. A pinched cable between the metal frame and the plastic housing is the #1 cause of 'Error 1' or 'Communication Failure' codes on modern smart treadmills.
Phase 4: Floor Leveling and Belt Tracking
Once the machine is fully assembled and plugged into a dedicated 15-amp outlet (never use an extension cord), turn it on at 2.0 MPH. Stand to the side and watch the rear edge of the belt.
- If the belt drifts left, turn the left rear leveling bolt clockwise by one-quarter turn.
- If the belt drifts right, turn the right rear leveling bolt clockwise by one-quarter turn.
- Allow the belt to run for 2 minutes after each adjustment. Never adjust belt tracking while the machine is off.
Common Installation Failure Modes & Edge Cases
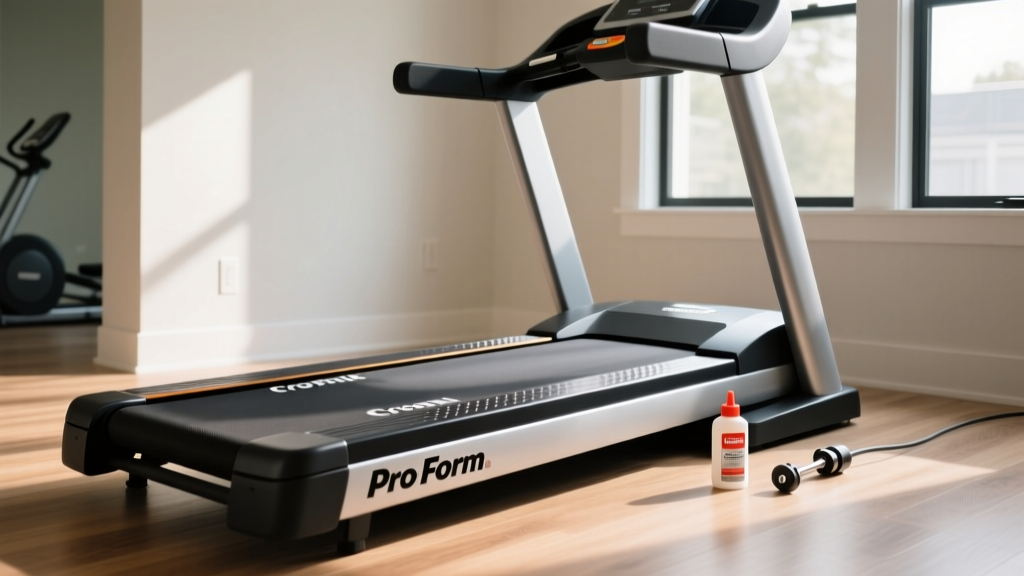
Warning: The Lubrication TrapMany new owners attempt to 'pre-lube' their treadmill belt out of the box using WD-40 or household silicone sprays. This will destroy the belt. You must use 100% pure liquid silicone specifically formulated for fitness equipment. Furthermore, most 2026 premium treadmill belts are pre-lubricated at the factory with a wax-based coating. Adding liquid silicone on top of wax creates a sludge that causes the belt to slip under heavy foot strikes.
Electrical Edge Cases
If your treadmill trips the breaker the moment you increase the incline, you likely have it plugged into a shared circuit with a refrigerator or HVAC system. Treadmill incline motors draw a massive transient current spike (up to 15 amps) when engaging. Always install a dedicated 15-amp or 20-amp circuit for your cardio zone to prevent long-term damage to the machine's lower control board.
Final Verdict: Making the Choice
So, regarding the ultimate question of bicycle or treadmill which is better? If your primary constraints are spatial limitations, multi-story living, and a desire for zero-maintenance setup, the stationary bike is the undisputed champion of convenience. However, if you have the ground-floor real estate, the electrical infrastructure, and the patience to execute a meticulous installation, a high-quality treadmill offers unparalleled biomechanical benefits, superior bone-density loading, and a more natural kinematic movement pattern. Treat the setup process with the precision of a mechanic, and your treadmill will deliver a decade of reliable service.
More gear to consider
All reviews
Troubleshooting Alternative Treadmill Classes: Curved vs Motorized
Treadmill Smells Like Burning Rubber? Best Folding Picks Reviewed

Curved Manual vs Motorized: ProForm 305 CST Treadmill Compared
Maintaining Compact Treadmills for HIIT Treadmill Workouts
Treadmill Spelling, Sizing, and Space: Compact Cardio Layouts