Beyond Dumbbell Exercises for Runners: Barbell Collar Setup Guide
Master the transition from dumbbell exercises for runners to heavy barbell lifts with our complete setup and installation guide to barbell collars.

The Progression: Transitioning from Dumbbell Exercises for Runners to Heavy Barbell Work
While dumbbell exercises for runners—such as walking lunges, single-leg Romanian deadlifts, and goblet squats—are foundational for correcting muscular imbalances and building unilateral stability, there comes a point in a runner's macrocycle where absolute force production must be prioritized. According to research published in the National Center for Biotechnology Information (NCBI), heavy resistance training significantly improves running economy and maximal sprint speed by enhancing neuromuscular coordination and tendon stiffness.
To achieve the necessary overload for posterior chain development (e.g., pulling 1.5x bodyweight deadlifts or performing heavy rack pulls), runners must eventually transition to the barbell. However, loading a barbell introduces a critical, often overlooked safety variable: the barbell collar. A failing collar during a high-velocity Olympic lift or a heavy eccentric squat can shift plates asymmetrically, causing catastrophic torque on the lumbar spine. This complete setup and installation walkthrough will guide you through selecting, installing, and maintaining the right barbell collars for your home or garage gym.
Why Collar Selection is a Critical Safety Setup
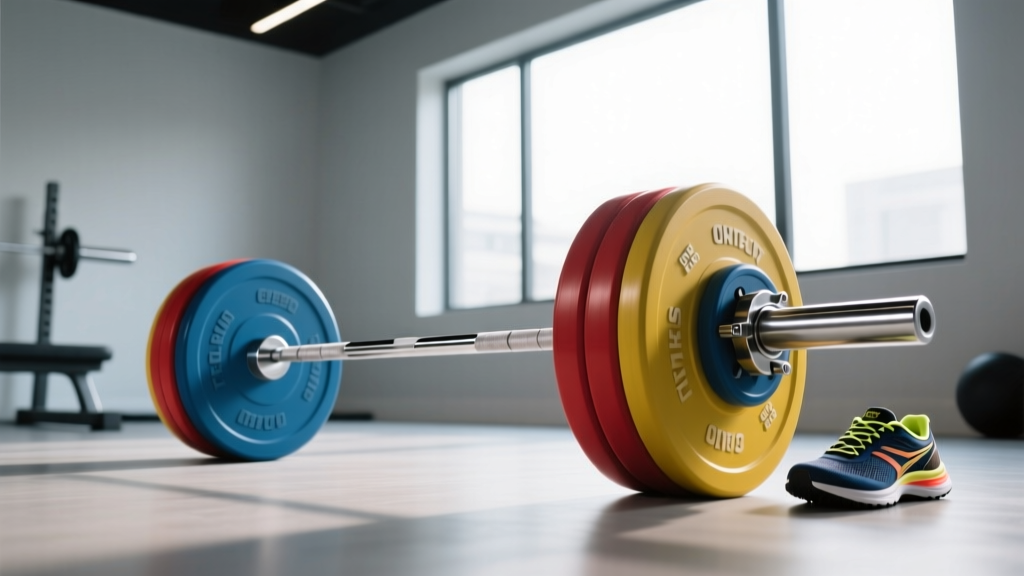
The standard Olympic barbell sleeve measures exactly 50mm in diameter, but manufacturing tolerances mean sleeves can range from 49.8mm to 50.4mm. A collar's primary job is to provide enough inward clamping force to counteract the lateral kinetic energy generated when bumper plates collide with the floor during drops. For runners incorporating explosive power cleans or high-rep touch-and-go deadlifts into their off-season conditioning, the collar must withstand repetitive micro-impacts without losing tension.
⚠️ Safety Warning: The Asymmetrical Shift
If a collar fails on one side of the barbell during a heavy squat or deadlift, the plates slide outward. This instantly shifts the center of mass, creating a severe lever-arm effect that can result in acute spinal shear or shoulder dislocation. Never rely on 'friction' or 'tight plate packing' as a substitute for a properly installed mechanical collar.
Barbell Collar and Clamp Types: A 2026 Comparison Matrix
The market is saturated with clamping mechanisms, each with distinct failure modes and ideal use cases. Below is a comprehensive comparison of the four primary collar types utilized in modern strength and conditioning facilities.
| Collar Type | Example Model (2026) | Avg. Price | Clamping Force | Best For | Primary Drawback |
|---|---|---|---|---|---|
| Spring Collars | Rogue Spring Collars | $14.50 / pair | Low-Medium | Quick changes, light accessory work | Slips on dropped bumpers; loses tension over time |
| Polymer Snap-Lock | Proloc Alpha Clamp | $24.00 / pair | Medium-High | High-rep deadlifts, CrossFit WODs | Brittle in freezing temperatures; plastic fatigue |
| Lever / Aircraft Clamp | Rogue HG 2.0 Lever Collars | $32.00 / pair | Very High | Heavy squats, power cleans, Olympic lifts | Bulky; can scratch chrome sleeves if dirty |
| Screw-Down Competition | Eleiko Olympic Collars | $85.00 / pair | Maximum (IWF Spec) | Competition, maximal 1RM attempts | Slow to install/remove; heavy (2.5kg each) |
Complete Installation Walkthrough: Securing Your Load
Proper installation is just as critical as the hardware itself. The International Weightlifting Federation (IWF) mandates strict collar usage in competition to ensure plate stability during the violent deceleration phases of the clean and jerk. Follow this step-by-step walkthrough to ensure your barbell is properly secured for heavy runner-focused lifts like deficit deadlifts and front squats.
Step 1: Sleeve Preparation and Cleaning
Before loading plates, inspect the barbell sleeve. Chalk buildup, rust, and dried sweat act as a lubricant under high pressure, reducing the coefficient of friction between the collar and the steel sleeve. Use a stiff nylon brush to remove chalk from the sleeve grooves. If your bar has a bare steel or oxidized sleeve, wipe it down with a microfiber cloth and a light application of 3-in-One oil, then wipe it completely dry. Never apply oil to the inner face of the collar where it contacts the plate.
Step 2: Plate Loading Sequence
Always load the heaviest bumper or cast-iron plates first, closest to the barbell shoulder (the lip of the sleeve). This ensures the widest base of support against the collar. If you are using fractional plates (e.g., 2.5lb or 5lb change plates), place them on the absolute outside, sandwiched between the larger bumper and the collar.
Step 3: Collar Positioning and the 'Rotation Gap'
Slide the collar onto the sleeve. Do not jam the collar flush against the outermost plate. Leave a precise 1mm to 2mm gap between the plate and the inner face of the collar. Why? During dynamic movements like power cleans or snatches, the barbell sleeve rotates independently of the shaft via internal bushings or bearings. If the collar is jammed flush, it creates lateral friction that inhibits sleeve rotation, transferring dangerous torsional torque directly into your wrists and elbows during the catch phase.
Step 4: Engaging the Locking Mechanism
- For Lever Collars (e.g., Rogue HG 2.0): Push the lever down until it clicks past the 90-degree centerline. You should feel a distinct mechanical 'over-center' lock. If the lever closes too easily, the collar is too loose; open it, adjust the tension screw with an Allen key, and re-engage.
- For Polymer Snap-Locks (e.g., Proloc): Squeeze the handles, slide the collar flush (leaving your 1mm gap), and release. Give the collar a sharp lateral tap with the palm of your hand to ensure the internal teeth have bitten into the sleeve knurling or grooves.
- For Spring Collars: Squeeze the handles, slide onto the sleeve, and release. Ensure the coiled spring is seated squarely on the sleeve, not caught on the edge of a plate.
Real-World Failure Modes and Edge Cases
Understanding how and why collars fail is essential for preventing gym injuries. Based on equipment stress-testing and community reports, here are the most common edge cases to watch for in 2026:
❄️ The Cold Garage Gym Warning
If you train in an unheated garage during the winter, avoid glass-filled nylon polymer clamps (like the standard Proloc Alpha). When ambient temperatures drop below 40°F (4°C), the polymer matrix becomes highly brittle. Dropping a barbell from overhead or even a heavy deadlift lockout can cause the clamp's internal locking teeth to shatter, resulting in an immediate plate dump. Switch to aircraft aluminum lever collars or steel spring collars during winter months.
Spring Collar 'Creep' on Olympic Lifts
Track runners utilizing Olympic lifts for power development should entirely avoid spring collars. The rapid deceleration at the bottom of a clean generates immense lateral G-force. Spring collars suffer from 'creep'—a gradual loss of tension over repeated impacts. By the third or fourth rep of a heavy complex, the spring collar will have shifted outward, compromising the bar's balance.
Chrome Sleeve Scarring
Using lever collars with dirty or debris-filled inner rubber linings will act like sandpaper against a polished chrome or hard-chrome sleeve. Over time, this strips the protective coating, leading to deep oxidation pits that ruin the barbell's spin. Always wipe the inner lining of your lever collars with a damp cloth every 30 days.
Frequently Asked Questions
Do I need collars for dumbbell exercises for runners?
No. Traditional hex or urethane dumbbells do not require collars as the weight heads are fixed or securely bolted by the manufacturer. However, if you are using loadable dumbbell handles (like Rogue Loadable Dumbbell Handles) to simulate heavy barbell work for exercises like farmer's carries or heavy lunges, you absolutely must use micro-collars or standard spring collars to secure the plates.
How often should I replace my barbell collars?
Spring collars should be replaced every 12 to 18 months of regular use, as the metal fatigues and loses its inward clamping force. High-quality aluminum lever collars and competition screw-down collars can last a lifetime, provided the internal rubber liners or O-rings are kept clean and occasionally treated with rubber protectant.
Can I use IWF 2.5kg competition collars for home training?
While you can, it is generally not recommended for home gyms. Competition collars weigh exactly 2.5kg each and are factored into the total competition lift weight. For home training, the added 5kg (11 lbs) of dead weight makes them cumbersome to handle, and the screw-down T-handle mechanism is too slow for supersets or high-density conditioning circuits commonly used by endurance athletes.
More gear to consider
All reviews
Dumbbell Rear-Delt Row: Rubber Hex vs Urethane Picks
Best Adjustable Dumbbells for Dumbbell Windmills: 2026 Review

Power Rack vs Squat Rack vs Stand for Pec Flys with Dumbbells
Home Gym Setup: Plate Types & Correct Dumbbell Press Form
Barbell Collar & Clamp Guide: Securing Plates for Dumbbell Punches