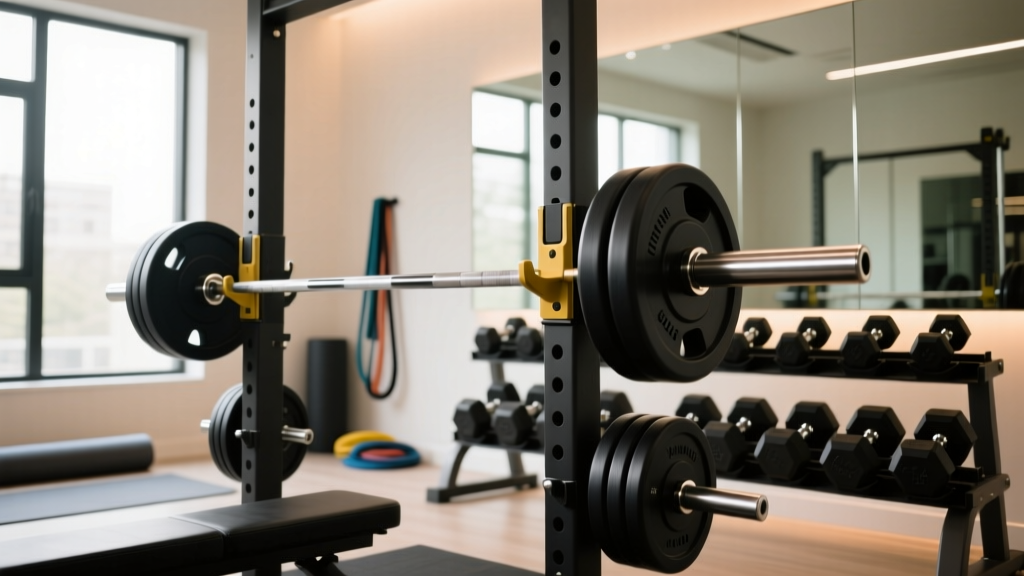
Secure Your Barbell Setup for a 3 Day Full Body Dumbbell Workout
Learn how to safely set up barbell collars and compare clamp types to supplement your 3 day full body dumbbell workout with heavy, secure compound lifts.

The Hybrid Shift: Beyond the 3 Day Full Body Dumbbell Workout
You have built a phenomenal foundation of muscle and conditioning using a strict 3 day full body dumbbell workout. Dumbbells are unparalleled for fixing imbalances, increasing range of motion, and building joint stability. However, as you enter intermediate and advanced stages of hypertrophy and strength, the limiting factor of a purely dumbbell-based routine becomes the absolute load you can safely move. To break through plateaus in your posterior chain and lower body, you must integrate heavy barbell compounds like squats, deadlifts, and hip thrusts.
Transitioning to a hybrid home gym setup requires a barbell, plates, and a squat rack. But the most critical, frequently overlooked safety component in this entire ecosystem is the barbell collar. A failed collar during a heavy eccentric squat or a high-velocity deadlift drop doesn't just ruin a set; it can cause catastrophic bar whip, plate avalanches, and severe injury. This complete setup and installation walkthrough will guide you through selecting, comparing, and properly installing barbell collars to ensure your hybrid routine remains safe and effective in 2026.
Barbell Collar and Clamp Types: A Deep-Dive Comparison
Not all collars are created equal. The market is flooded with cheap spring clips that fail under dynamic loads, alongside premium locking mechanisms engineered for Olympic weightlifting. According to BarBend's comprehensive guide to barbell collars, choosing the right clamp depends entirely on your training modality and the tolerances of your barbell sleeves.
1. Spring Clips (The Outdated Standard)
Constructed from zinc-plated steel wire, spring clips rely on tension to grip the sleeve. While they cost around $10 to $15 per pair and are lightweight, they are notoriously unreliable for heavy or dynamic lifts. Under high-velocity bar whip, the metal fatigues, and the grip force plummets. They are acceptable only for light accessory work or static machine pin-loading.
2. Locking Clamp Collars (e.g., Lock-Jaw Pro)
Made from glass-filled nylon with a TPU (thermoplastic polyurethane) O-ring, locking clamps like the Lock-Jaw Pro ($35/pair) use a cam-lever system to bite into the sleeve. They are incredibly durable, survive thousands of drops, and offer excellent grip force. However, because the nylon body is rigid, they require a barbell sleeve that is very close to the standard 50mm diameter. On budget bars with narrower sleeves (e.g., 49.5mm), the rigid clamp may fail to engage the O-ring fully, leading to slippage.
3. Premium Extruded Aluminum Collars (e.g., Rogue HG 2.0)
The gold standard for serious lifters. The Rogue HG 2.0 ($45/pair) features a machined aluminum body and a thick, high-durometer TPU O-ring. The cam-lever mechanism generates immense lateral clamping force. Because the O-ring is highly compressible, it easily compensates for manufacturing variances in barbell sleeve diameters, ensuring a rock-solid grip even on heavily worn or slightly undersized Olympic sleeves.
Collar Comparison Matrix (2026 Market Data)
The following data is synthesized from Garage Gym Reviews' empirical testing on collar grip force and manufacturer specifications.
| Collar Type | Material Composition | Avg Price (2026) | Estimated Lateral Grip Force | Best Use Case |
|---|---|---|---|---|
| Spring Clips | Zinc-Plated Steel | $10 - $15 | < 20 lbs | Light accessories, pin-loaded machines |
| Lock-Jaw Pro | Glass-Filled Nylon, TPU | $35 | ~ 110 lbs | General powerlifting, budget setups |
| Rogue HG 2.0 | Extruded Aluminum, TPU | $45 | > 150 lbs | Heavy Olympic lifts, dynamic bar whip |
| Eleiko Platform Collars | Machined Steel, Rubber | $85 | > 200 lbs | Competition weightlifting, extreme drops |
Step-by-Step Installation Walkthrough
Proper installation is just as important as the hardware itself. When supplementing your 3 day full body dumbbell workout with heavy barbell squats, follow this exact protocol to secure your plates.
SAFETY WARNING: Never load plates and apply collars while the barbell is resting on the floor if you plan to squat. Always load the bar inside the squat rack at the proper height to ensure plates are fully seated against the inner sleeve lip before clamping.- Sleeve Preparation: Wipe the barbell sleeve with a microfiber cloth. Chalk dust and sweat create a lubricating layer that reduces the friction coefficient between the TPU O-ring and the steel sleeve by up to 40%.
- Plate Seating: Load your bumper or iron plates. Give the barbell a firm horizontal tap against the upright of your squat rack to ensure all plates are seated completely flush against the inner sleeve shoulder.
- Collar Placement: Slide the collar onto the sleeve. Push it firmly until the inner face of the collar is completely flush against the outermost plate. There must be zero visible gap between the plate and the collar.
- Cam Engagement: Pull the locking lever away from the collar body, slide it to the final position, and press the lever down. You should feel a distinct 'snap' and resistance. The lever should sit slightly past the 90-degree mark (over-center) to prevent it from vibrating loose during bar whip.
- The Lateral Shake Test: Grab the outermost plate and attempt to slide it laterally with roughly 30 lbs of force. If the plate shifts even a millimeter, release the lever, push the collar tighter, and re-engage.
Failure Modes and Edge Cases to Monitor
Even the best equipment fails if you ignore the physics of the barbell. According to Rogue Fitness HG 2.0 Collar specifications, the clamping force relies entirely on the integrity of the O-ring. Here are the edge cases you must manage:
O-Ring Degradation and Compression Set
TPU O-rings undergo 'compression set' over time—meaning they lose their ability to bounce back to their original shape after being crushed by the cam lever. If your collars are over three years old and left clamped on the bar between sessions, the O-ring will flatten. Once the O-ring loses more than 15% of its original thickness, the clamp will no longer generate sufficient lateral force, and plates will rattle during deadlifts. Inspect your O-rings quarterly and replace them annually.
Bar Whip Dynamics
When you transition from the controlled, shorter lever arms of your 3 day full body dumbbell workout to a heavily loaded barbell deadlift (e.g., 405+ lbs), the barbell experiences extreme 'whip' (elastic deformation). Heavy, rigid collars like steel competition clamps can actually exacerbate the shockwave traveling down the sleeve, potentially cracking cheap cast-iron plates. For high-whip scenarios, aluminum collars with thick TPU rings act as a micro-damper, absorbing the kinetic energy and protecting both your plates and your floor.
Knurling Interference
Some aggressive outer knurling patterns on power bars extend too close to the sleeve. If you fail to push the collar completely past the knurling, the steel teeth will chew into the TPU O-ring, causing micro-tears that lead to catastrophic slippage within weeks.
Expert Insight: 'Treat your barbell collars like the brakes on your car. You don't realize they are failing until you are at the bottom of a heavy squat and the weight shifts laterally, throwing your center of gravity off by a crucial inch.' — FitGearPulse Biomechanics Team
Final Thoughts on Hybrid Programming
Integrating heavy barbell movements into a 3 day full body dumbbell workout is one of the most effective ways to force neuromuscular adaptation and break through stubborn hypertrophy plateaus. However, the safety of your home gym relies on the smallest components in your setup. Invest in high-quality extruded aluminum or premium nylon locking collars, maintain the O-rings, and execute the installation walkthrough every single time you load the bar. Your joints, your equipment, and your progress depend on it.
More gear to consider
All reviews
Beyond 10 Best Arm Exercises With Dumbbells: Barbell Knurling Guide

Loadable Dumbbells for Dumbbell Straight Leg Deadlifts: 2026 Trends
Power Rack vs Squat Rack vs Stand: Hack Squat Alternative with Dumbbells
Cast Iron vs Competition Kettlebells: Upper Chest Workout Dumbbell?

Power Rack vs Squat Rack vs Stand: Setup for Russian Deadlift with Dumbbells
