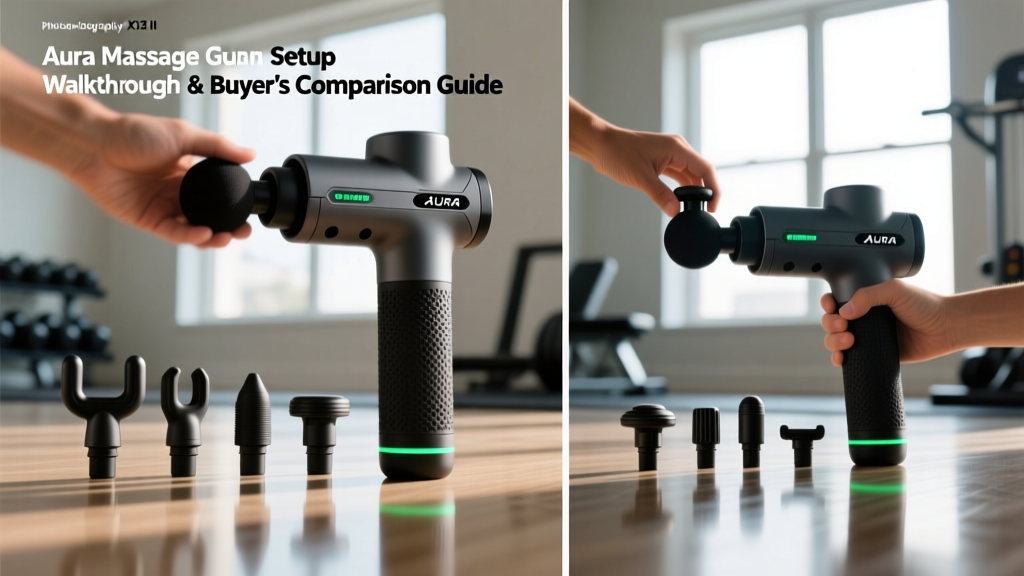
Aura Massage Gun Setup Walkthrough & Buyer's Comparison Guide
Master your Aura massage gun setup, from firmware installation to attachment calibration, and see how it compares to top percussive therapy rivals.

When discussing 'installation' and 'setup' for a handheld percussive device like the Aura Massage Gun, we aren't talking about mounting hardware to a wall. Instead, proper installation refers to the critical out-of-the-box calibration, companion app firmware flashing, and physical motor break-in protocols that dictate the device's long-term lifespan and performance envelope. Many users unbox their recovery tools, attach a foam head, and immediately press it into a cold hamstring at maximum RPM—only to experience premature motor stalling or battery degradation.
This comprehensive walkthrough will guide you through the exact physical and digital setup of the Aura Massage Gun. Following the installation guide, we will pivot into a rigorous 2026 buyer's comparison matrix, pitting the Aura against industry titans like the Theragun Pro Plus and Hyperice Hypervolt 2 Pro to help you determine which percussive therapy device deserves a spot in your recovery stack.
Phase 1: Physical Installation and Attachment Calibration
The Aura Massage Gun utilizes a dual-pin friction lock mechanism for its treatment heads. This is a deliberate engineering upgrade over the single-pin snap fittings found on entry-level models, designed to eliminate the 'rattle' that occurs during high-frequency percussive strikes.
Proper Attachment Seating Protocol
- Pin Alignment: Inspect the titanium dual-pins on the attachment stem and the receiver slots on the gun's actuator arm. Ensure no debris or packaging silicone is lodged in the receiver.
- Force Application: Apply approximately 15 to 20 Newtons of straight downward force. Do not twist the attachment while inserting, as this can strip the internal silicone dampeners.
- The Secondary Click: You will feel an initial resistance, followed by a distinct secondary auditory 'click.' This confirms the friction lock is fully engaged. If the attachment wobbles laterally by more than 1 millimeter, remove and reseat it.
Never use a mallet or excessive body weight to force an attachment. If the pins are misaligned and forced, you risk bending the actuator arm, which will cause a permanent oscillation wobble and void the manufacturer's warranty.
Phase 2: Digital Setup and Firmware Installation
Modern smart massage guns rely on internal microcontrollers to manage torque output and battery thermal limits. Out of the box, your Aura Massage Gun is likely running factory firmware that may lack the latest motor-efficiency algorithms.
App Pairing and Flashing
- Download & Permissions: Download the official Aura Recovery app. Critical Note: Both iOS 17+ and Android 14+ require you to grant 'Location Services' and 'Nearby Devices' permissions for Bluetooth Low Energy (BLE) discovery to function. Denying these will result in a failed pairing loop.
- Initial Handshake: Power on the device by holding the base button for 3 seconds. Open the app and tap 'Add Device.' The handshake takes roughly 4 seconds.
- Firmware Installation: If an update is available, the app will prompt you to install it. This process takes between 4 to 7 minutes. Do not power off the device or close the app during this window. The gun's LED ring will pulse blue during the flash and turn solid green upon completion.
"Firmware updates in 2026 smart recovery tools aren't just about adding app features; they actively recalibrate the thermal throttling thresholds of the brushless motor, allowing for sustained high-stall-force output without triggering early shutdown protections." — FitGearPulse Engineering Desk
Phase 3: The Motor Break-In Protocol
Just like a new car engine or high-end power tool, the brushless motor and internal bearings of the Aura Massage Gun require a break-in period to properly distribute factory lubricants and seat the internal components.
The 30-Minute Spectrum Run: Before using the device on your body, place it on a towel on a hard surface. Turn it on and cycle through all 5 speed settings, spending 5 minutes at each RPM tier (from 1750 PPM up to 3200 PPM). This warms the lithium-ion cells and ensures the eccentric rotating mass is balanced under zero-load conditions.
The 2026 Buyer’s Matrix: Aura vs. Theragun vs. Hyperice
How does the Aura stack up against the established market leaders? Below is a technical comparison matrix based on current 2026 specifications, pricing, and setup complexity. For deeper context on market leaders, you can review Wired's comprehensive percussive therapy buyer guide.
| Metric | Aura Smart Pro | Theragun Pro Plus (5th Gen) | Hyperice Hypervolt 2 Pro |
|---|---|---|---|
| Current Price | $299.00 | $599.00 | $349.00 |
| Amplitude (Depth) | 16 mm | 16 mm | 14 mm |
| Stall Force | 60 lbs | 60 lbs | 40 lbs |
| Setup Complexity | Moderate (App + Firmware required for full features) | High (Therabody ecosystem integration) | Low (Plug-and-play, optional app) |
| Weight | 2.4 lbs | 2.8 lbs | 2.6 lbs |
| Smart Features | Biometric auto-adjust, Heat/Cold attachments | OLED screen, Bluetooth, Guided routines | Pressure indicator, App connectivity |
Decoding the Specifications
Amplitude vs. Stall Force: As detailed in Therabody's official Pro Plus specifications, a 16mm amplitude is the gold standard for reaching deep-tissue fascia. The Aura matches this 16mm depth and the 60 lbs of stall force, meaning you can press aggressively into dense muscle bellies (like the gluteus maximus or vastus lateralis) without the motor choking. By contrast, the Hyperice Hypervolt prioritizes a quieter, more surface-level vibration profile with its 14mm amplitude and lower stall force, making it better suited for cranial or neck work, but less effective for deep athletic recovery.
Decision Framework: Is the Aura Right for Your Stack?
Choosing a recovery tool isn't just about raw power; it's about how the device integrates into your lifestyle and technical tolerance.
- Buy the Aura Smart Pro if: You want flagship 16mm amplitude and 60 lbs of stall force but refuse to pay the $600 'brand tax' associated with Therabody. You are also comfortable with a mandatory app setup and firmware installation to unlock the biometric auto-adjust features.
- Buy the Theragun Pro Plus if: You are already embedded in the Therabody ecosystem (using their smart rollers or compression boots) and want unified app control, or if you require the built-in OLED screen for gym-floor adjustments without pulling out your phone.
- Buy the Hypervolt 2 Pro if: You prioritize acoustic discretion. The Hypervolt's QuietForce technology makes it significantly quieter than the Aura, which is critical if you are doing recovery work in a shared office, a quiet bedroom, or while watching film in a locker room.
Long-Term Maintenance and Battery Upkeep
The most common point of failure in percussive therapy devices is not the motor, but the lithium-ion battery management system (BMS). To ensure your Aura Massage Gun survives years of heavy use, adhere to these storage rules:
The 60% Storage Rule
Never store your massage gun at 100% charge for extended periods. If you are traveling or taking a deload week where the device won't be used for more than 14 days, discharge the battery to approximately 60%. Storing Li-ion cells at maximum voltage accelerates chemical degradation and increases internal resistance, leading to premature voltage sag when the motor demands peak stall force.
By treating the setup, installation, and maintenance of your massage gun with the same rigor as your actual training programming, you ensure the hardware operates at peak efficiency. Whether you choose the value-driven Aura, the ecosystem-heavy Theragun, or the whisper-quiet Hypervolt, proper calibration is the key to unlocking true percussive therapy benefits.
More gear to consider
All reviews
Compression Boot Review: firmware recovery tool epson Fixes

Kupaky Massage Gun Comparison: Buying Guide & Troubleshooting

Infrared Sauna Panel & Blanket Guide: Bob and Brad Massage Gun Tips

Maintain Smart Cupping Gear Like a SQL Server Database Recovery Tool

Heat Pads: The Physical SQL Server Recovery Tool for Back Pain
